

User Management
Learn how Company Admins and Super Users create accounts, manage multi-role assignments, deactivate users, handle password changes, and switch active roles.
Overview
Company Admins and Super Users can add, update, deactivate, and manage role assignments for users via the Users section in the left sidebar.
Create User
Step-by-Step Guide to Creating a New User
Navigate to Users and click Create User
Click Users in the left sidebar, then click the blue Create User button in the upper right header.
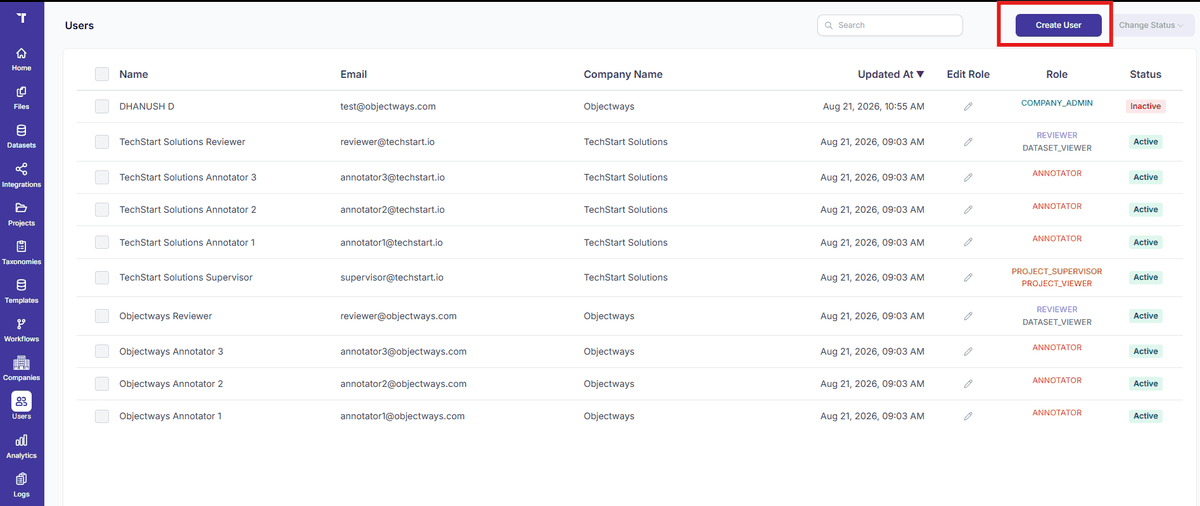
Figure 15: Users List - Create User Button
Enter Full Name and Email address
Enter the user's formal name and corporate email address.
Enter and confirm Password
Specify a secure initial password with a minimum length of 8 characters containing letters and numbers.
Select one or more Roles
Choose the user's roles from the available list (e.g. Annotator, Reviewer, Project Supervisor).
(Super Users only) Select Company
Super Users select the target tenant from the dropdown. Note: Company Admins automatically create users inside their own company.
Allow alternate MFA email (Optional)
Enable if the user account uses a shared or alias email address. When enabled, a Send code to a different mail option appears on the OTP verification screen for this user.
Click Create User
The user is created and will appear in the active Users list.
Deactivating and Activating Users
Deactivating a user immediately revokes system access without deleting any historical annotations, time intervals, or audit trails. Both single-user and bulk operations are supported:
- Select the user(s) using the checkboxes on the left side of the table.
- Click the Change Status button in the table header.
- Choose Deactivate or Activate.
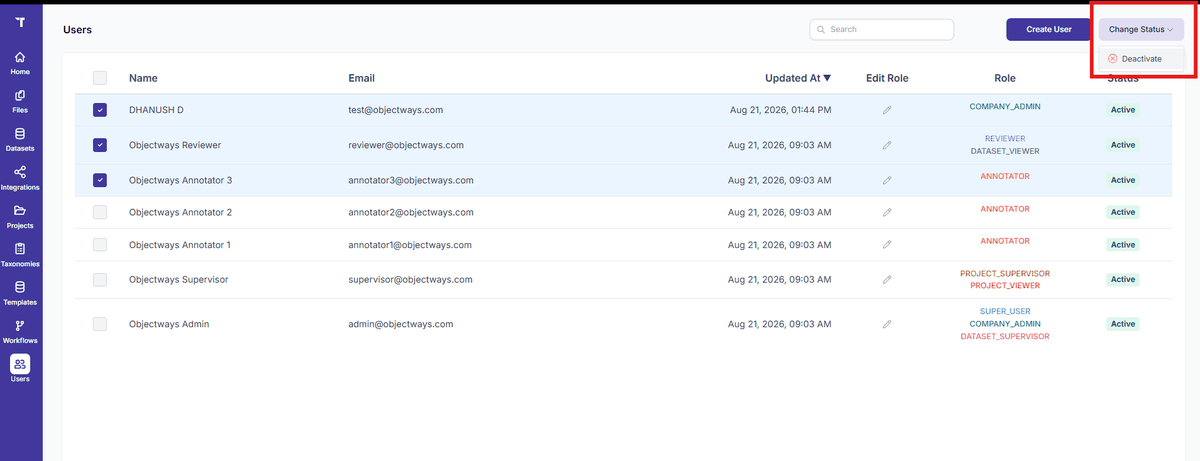
Figure 16: User - Change Status
Role Management
Users can hold multiple roles simultaneously within the same company (e.g., Annotator and Project Supervisor). For descriptions of permissions, refer to Section 2.4 Roles.
Assigning a New Role to a User
- Navigate to Users and click the Edit icon (pencil) in the user's row.
- Select the appropriate additional roles from the dropdown.
- Click Add Role to persist the assignment.
Switching Roles
Users assigned multiple roles can switch active roles at any time without logging out.
Step-by-Step Guide
Exit active task
Ensure you are not actively working on a task inside an annotation tool. Exit back to the main dashboard.
Click your profile icon
Click the circular avatar icon located at the bottom of the left sidebar.
Select Switch Role
Choose Switch Role from the popup profile menu.
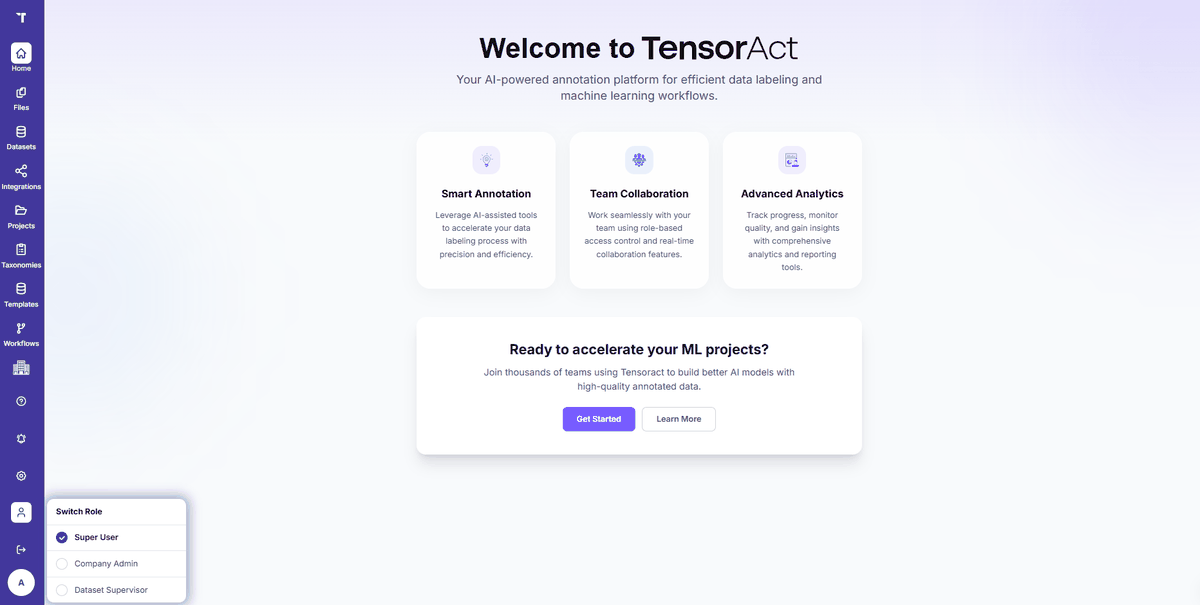
Figure 17: Switch Role - Role Selection Menu
Choose your active role
A role-selection panel displays all your assigned privileges. Click the desired role. The platform immediately updates your session and redirects you to the corresponding landing interface.
Changing Your Password
There are two operational scenarios for password modifications:
Scenario A Admin-Forced Reset
After signing in with a temporary password provided by an administrator, you are automatically redirected to the Change Password page. Enter your New Password and Confirm Password (min 8 characters, letters and numbers required), then click Change Password. You are redirected to login.
Scenario B Voluntary Change
Navigate to Change Password at any time while logged in. Enter your Current Password, New Password, and Confirm Password, then click Change Password. For security, your session is terminated and you are redirected to the Login page to sign in with your updated credentials.
Logging Out
- Click your profile avatar at the bottom of the left sidebar.
- Select Logout from the menu and confirm the action in the prompt.