

Integrations (AWS S3 Connections)
Establish secure, cross-account AWS IAM role assumption to stream objects directly from your S3 buckets without permanent access keys, configure CORS policies, and validate connectivity.
Overview
Connect Tensoract to your AWS S3 buckets for seamless direct file import. Accessible to Super Users, Company Admins, and Dataset Supervisors via Integrations in the left sidebar.
Creating an AWS S3 Integration
Tensoract enforces zero-standing-privilege security using AWS IAM Role cross-account assumption (no long-term IAM access keys or secret keys are ever stored or required).
Step-by-Step Guide
Navigate to Integrations and click Add Integration
From the left sidebar, click Integrations, then click the blue Add Integration button.
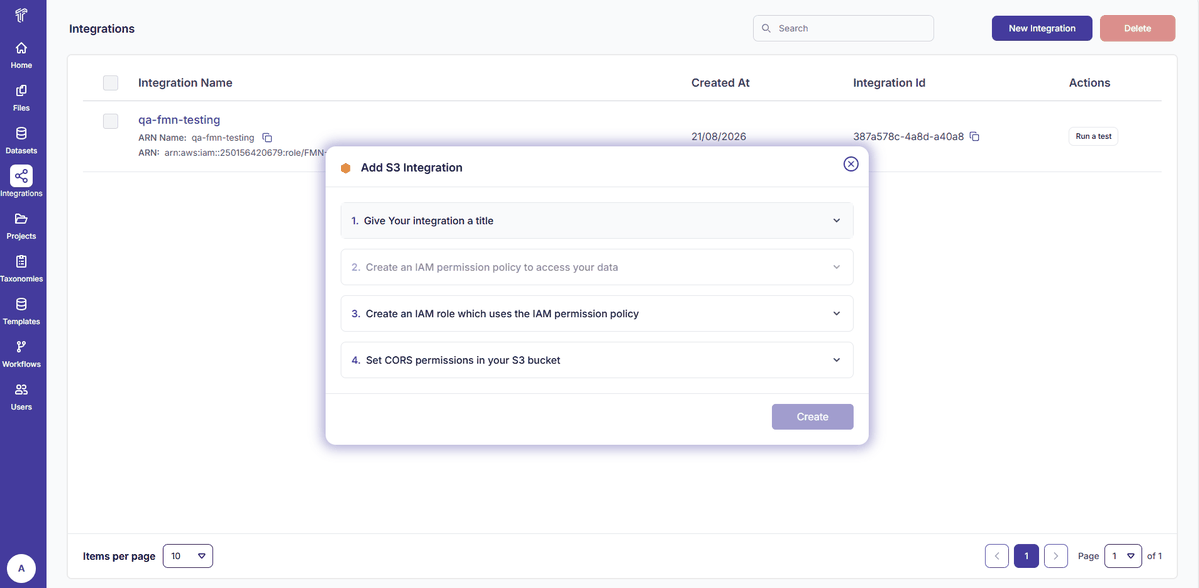
Figure 29: Integrations - Add Integration
Enter Integration details and generate IAM permission code
Enter the Integration title and your actual S3 Bucket name as defined in your AWS account. Select IAM permissions and copy the generated policy snippet.
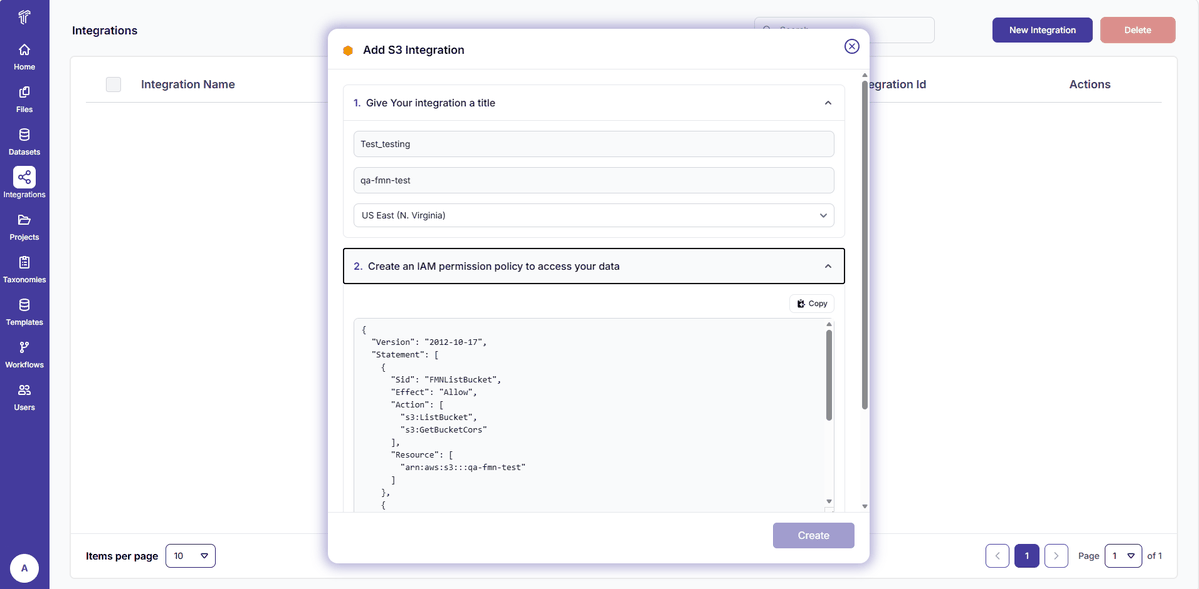
Figure 30: Integration - Title, Bucket, and IAM Permission
Create an IAM Policy in AWS Console
In the AWS Management Console, open IAM Policies Create Policy. Select the JSON tab, paste the permission code, and click Next.
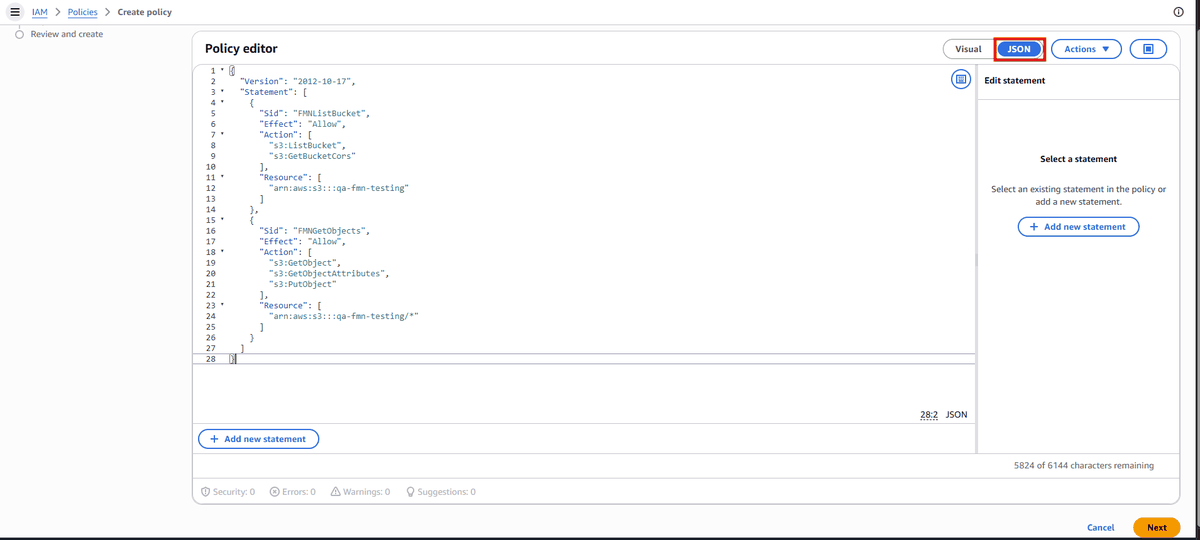
Figure 31: AWS IAM - Create Policy
{
  "Version": "2012-10-17",
  "Statement": [
    {
      "Sid": "TensoractS3BucketAccess",
      "Effect": "Allow",
      "Action": [
        "s3:ListBucket",
        "s3:GetBucketLocation"
      ],
      "Resource": "arn:aws:s3:::your-bucket-name"
    },
    {
      "Sid": "TensoractS3ObjectAccess",
      "Effect": "Allow",
      "Action": [
        "s3:GetObject",
        "s3:PutObject"
      ],
      "Resource": "arn:aws:s3:::your-bucket-name/*"
    }
  ]
}Name and Create the IAM Policy
Provide a descriptive Policy Name (e.g. Tensoract-S3-Access-Policy)
and click Create Policy.
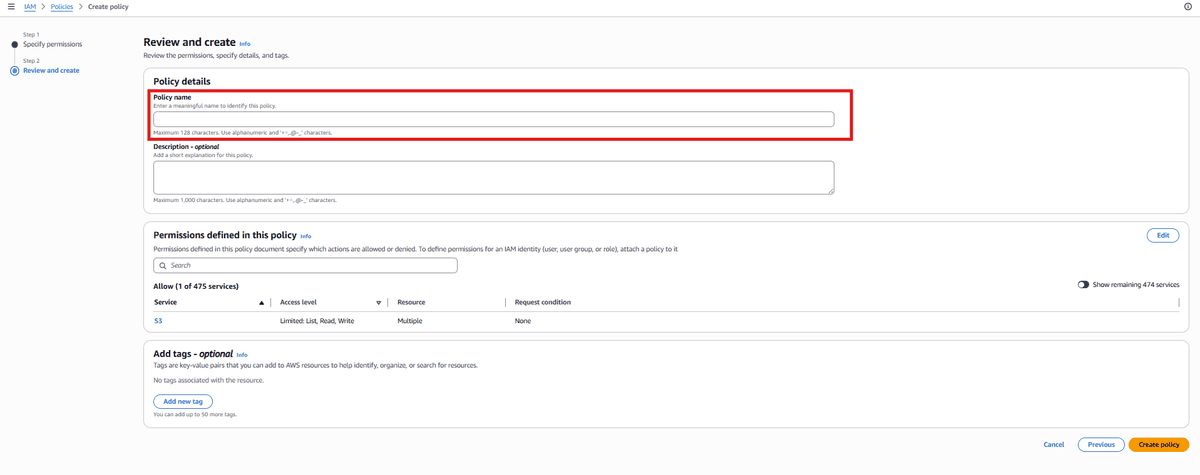
Figure 32: AWS IAM - Policy Title
Obtain Account ID and External ID
Return to Tensoract. The integration setup modal displays the unique Account ID and External ID required to establish the trust relationship.
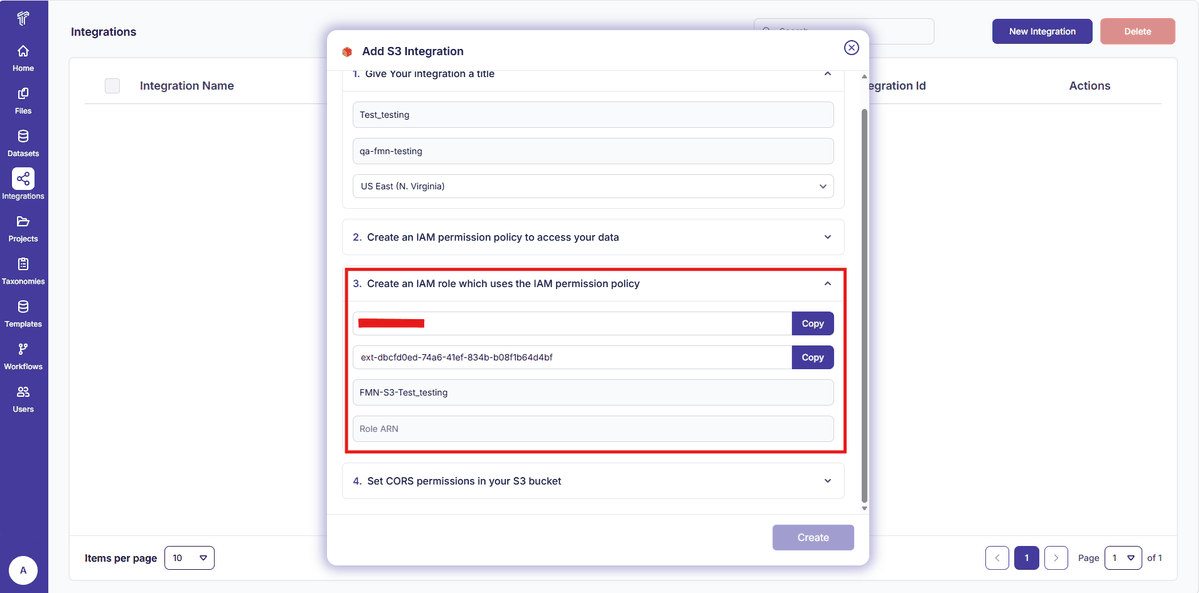
Figure 33: Integration - Account ID and External ID (Tool Panel)
Create the IAM Role in AWS
In AWS IAM, navigate to Roles Create Role. Choose AWS Account as the trusted entity type, check Require external ID, and paste the External ID from Tensoract. Click Next, attach the IAM Policy created in Step 3, enter a Role Name, and click Create Role.
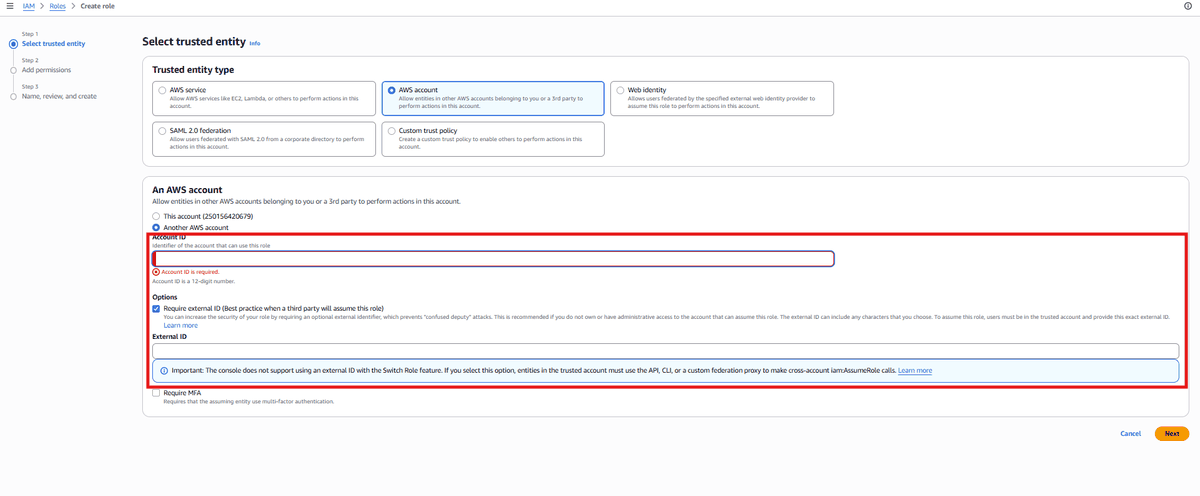
Figure 34: AWS IAM - Trusted Entity Setup (Account ID and External ID)
Copy the Role ARN
Once the role is created, copy its Role ARN (e.g.
arn:aws:iam::123456789012:role/TensoractRole) and paste it into the Role
ARN field in Tensoract.
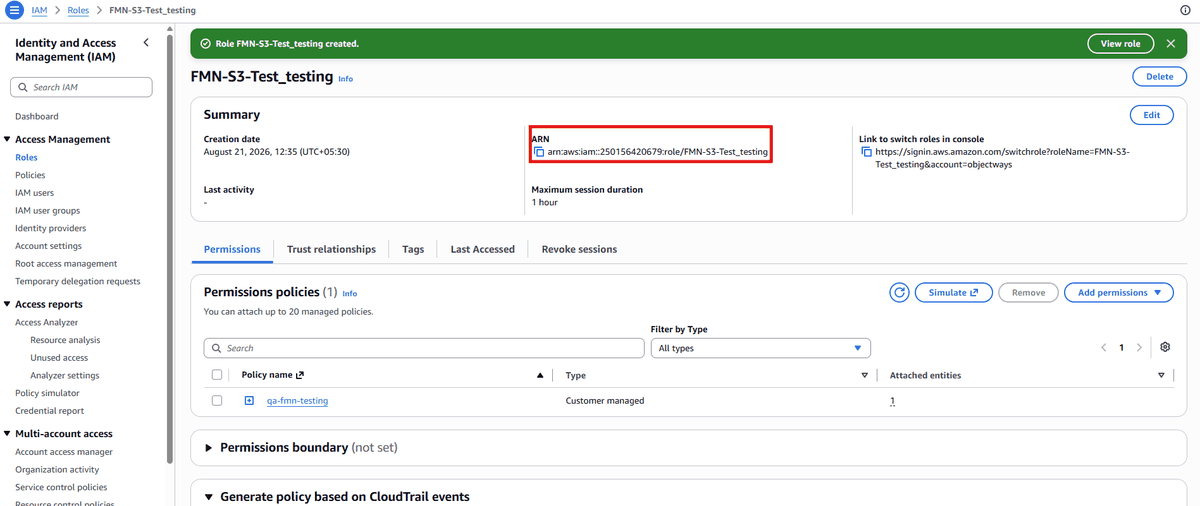
Figure 35: Integration - Role ARN
Configure CORS on your S3 Bucket
Copy the CORS configuration snippet in Tensoract. In AWS S3, open your bucket, go to Permissions Cross-origin resource sharing (CORS), click Edit, paste the JSON, and click Save changes.
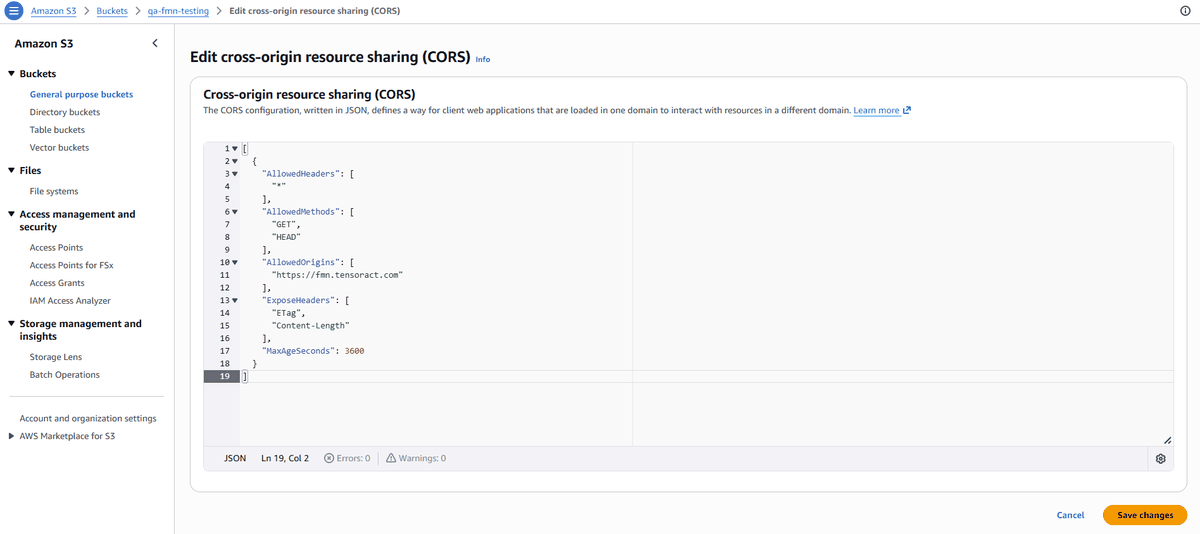
Figure 36: S3 - CORS Configuration
[
  {
    "AllowedHeaders": [
      "*"
    ],
    "AllowedMethods": [
      "GET",
      "HEAD",
      "PUT"
    ],
    "AllowedOrigins": [
      "https://app.tensoract.com"
    ],
    "ExposeHeaders": [
      "ETag",
      "Content-Length"
    ],
    "MaxAgeSeconds": 3000
  }
]Click Create in Tensoract
Once the IAM Policy, Role ARN, S3 bucket name, and CORS configuration are configured, click Create in the tool modal.
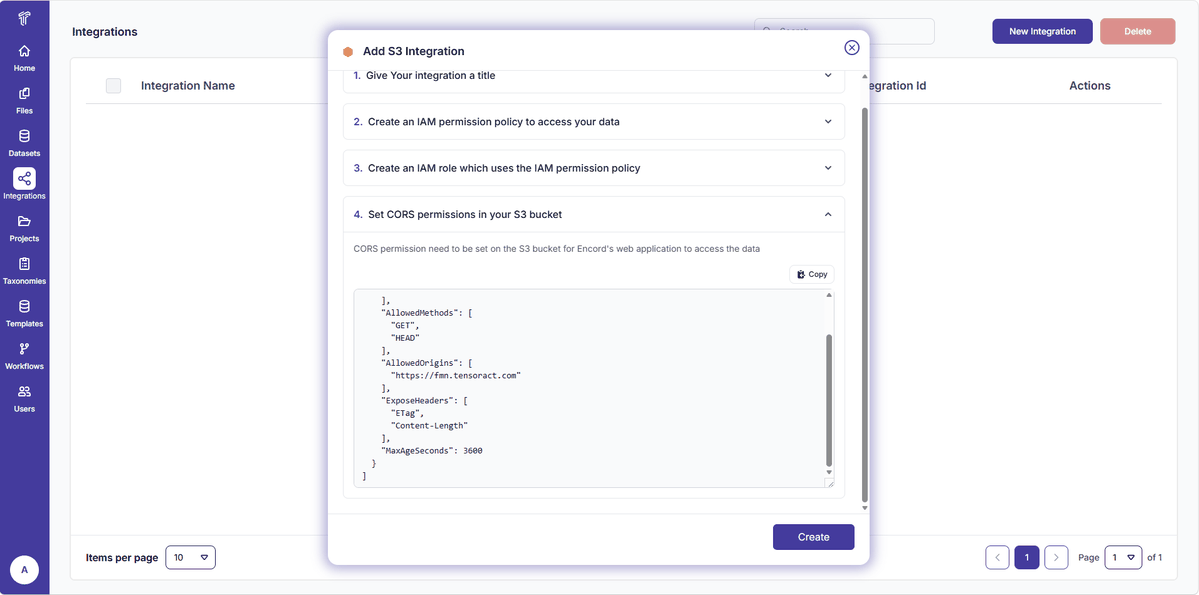
Figure 37: Integration - Final Create Step
Integration Complete
A successful integration is confirmed. You can now browse bucket prefixes and import objects directly into Files and Datasets.
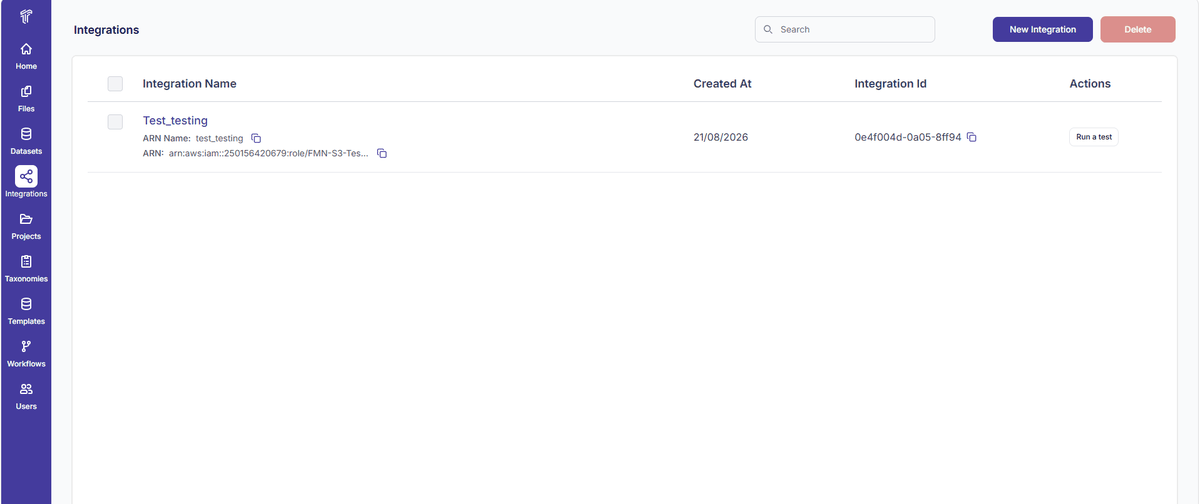
Figure 38: Integration - Success Confirmation
Validating Integrations
Click Run a Test on any integration row and paste a test object URL from your S3 bucket to verify read permissions and CORS handshakes.
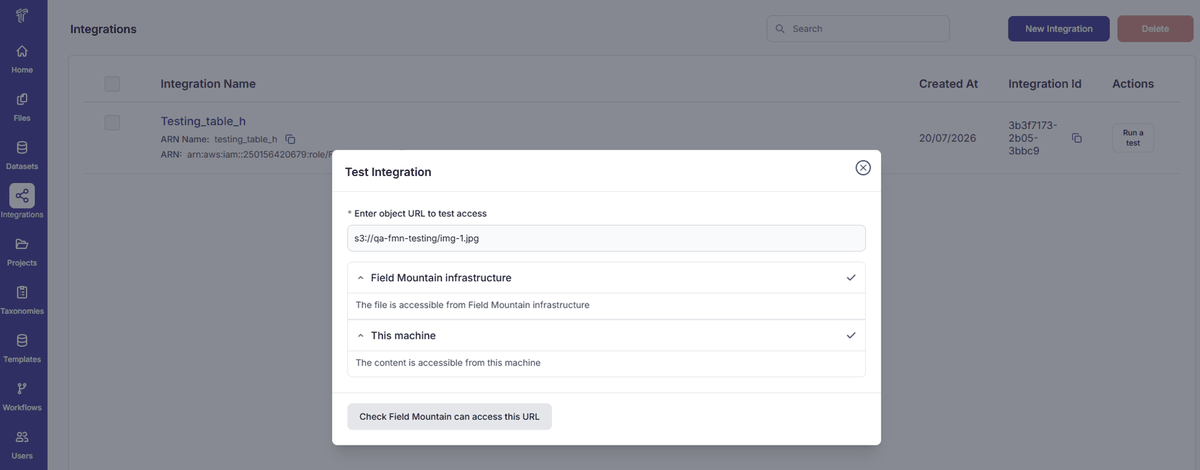
Figure 39: Integration - Run a Test
- Health Status Badges:
HEALTHY Full read/write and CORS validation passed.
DEGRADED Bucket accessible but CORS misconfigured.
UNHEALTHY IAM Role assumption failed or access denied.
UNKNOWN Validation has not yet been executed. - Granular Checks: Dedicated indicators verify IAM Validation and CORS Validation independently.
Deleting Integrations
Select an integration from the table and click Delete.