

Taxonomies
Define structured workflow labels, relationships, and conditional branching pathways that drive dynamic task routing across workflow nodes.
Overview
Taxonomy is used to define structured workflow labels, such as escalation-related options, that can be used to guide task routing or workflow decisions. Taxonomy labels cannot be used for data annotation; annotation labels are defined separately within the project template.
Taxonomy Components
- Labels (Classes): The categorisation labels (e.g. "Vehicle", "Pedestrian", "Requires Escalation").
- Relationships: Named semantic interactions between different labels (e.g. "has-part", "associated-with").
Guide: Creating a Taxonomy
Step-by-Step Guide
Navigate to Taxonomies
Click Taxonomies in the left sidebar and click the blue Create Taxonomy button.
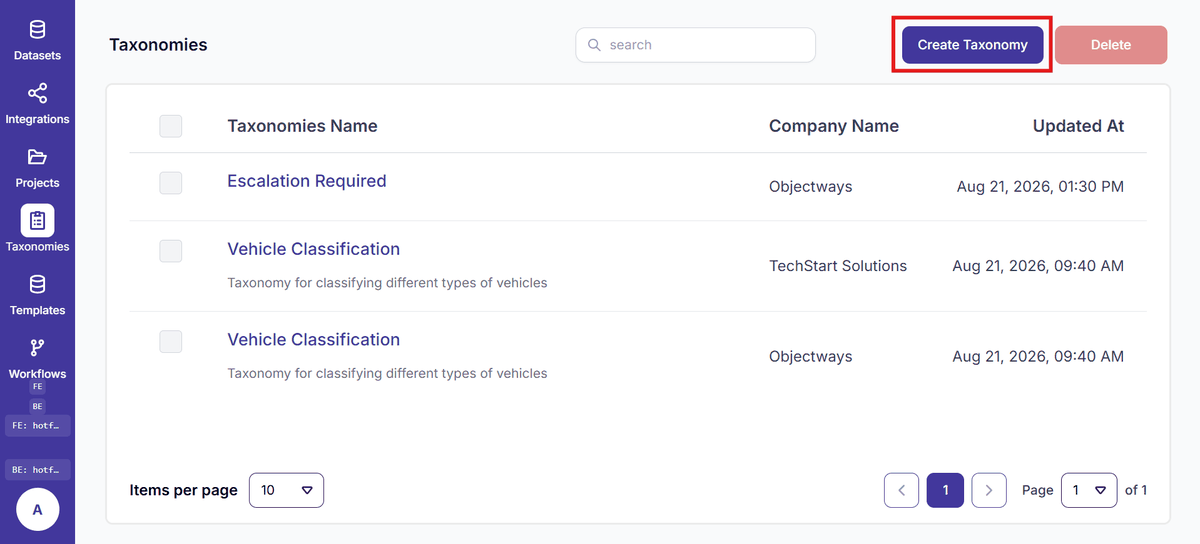
Figure 46: Create Taxonomy Page
Enter Name and Description
Provide a clear taxonomy title (e.g. Escalation Required) and optional
usage notes.
Add Labels
Under the Labels section, type a label name and click Add Label.
Configure Multiple Labels
For each added label, configure: Name, Color (hex code), optional Alias, and Default state.
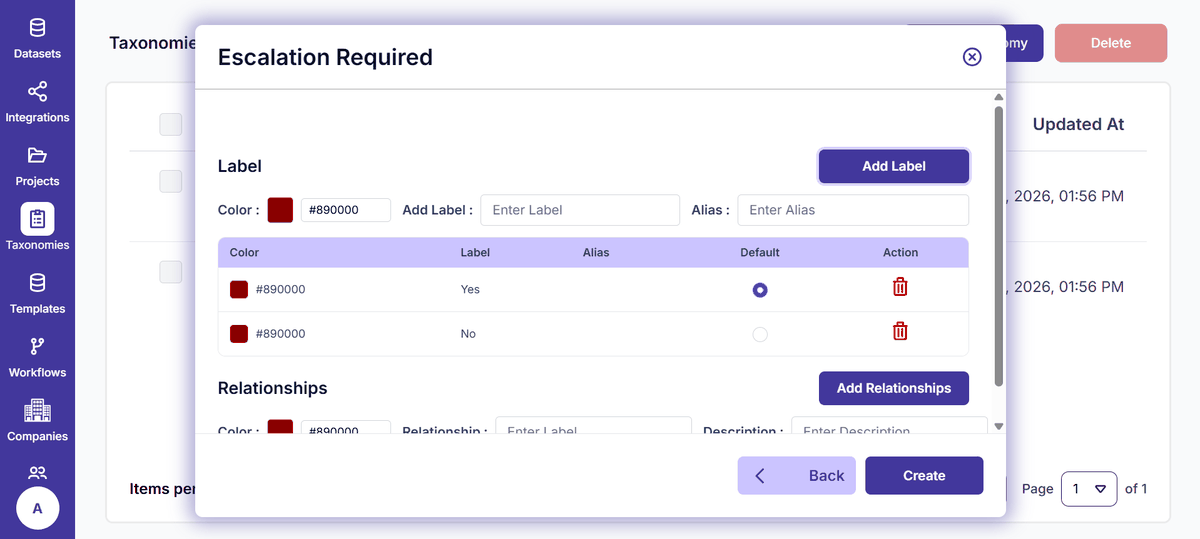
Figure 47: Taxonomy - Add Label
Set Default Label
The first added label is automatically marked as default. You can select another radio button to make it the default, or click the selected radio button again to deselect it (leaving no default).
(Optional) Add Relationships
Specify a Name, Color, and optional Description for each relationship. (Note: Relationships currently do not serve a specific functional routing purpose).
Click Create
Click Create to finalize and publish the taxonomy.
Managing Taxonomies
View, search, filter, and paginate through all company taxonomies from the Taxonomies dashboard.
Deleting Taxonomies
From the Taxonomies list, select the taxonomy you wish to delete and click the Delete icon, then confirm in the prompt.
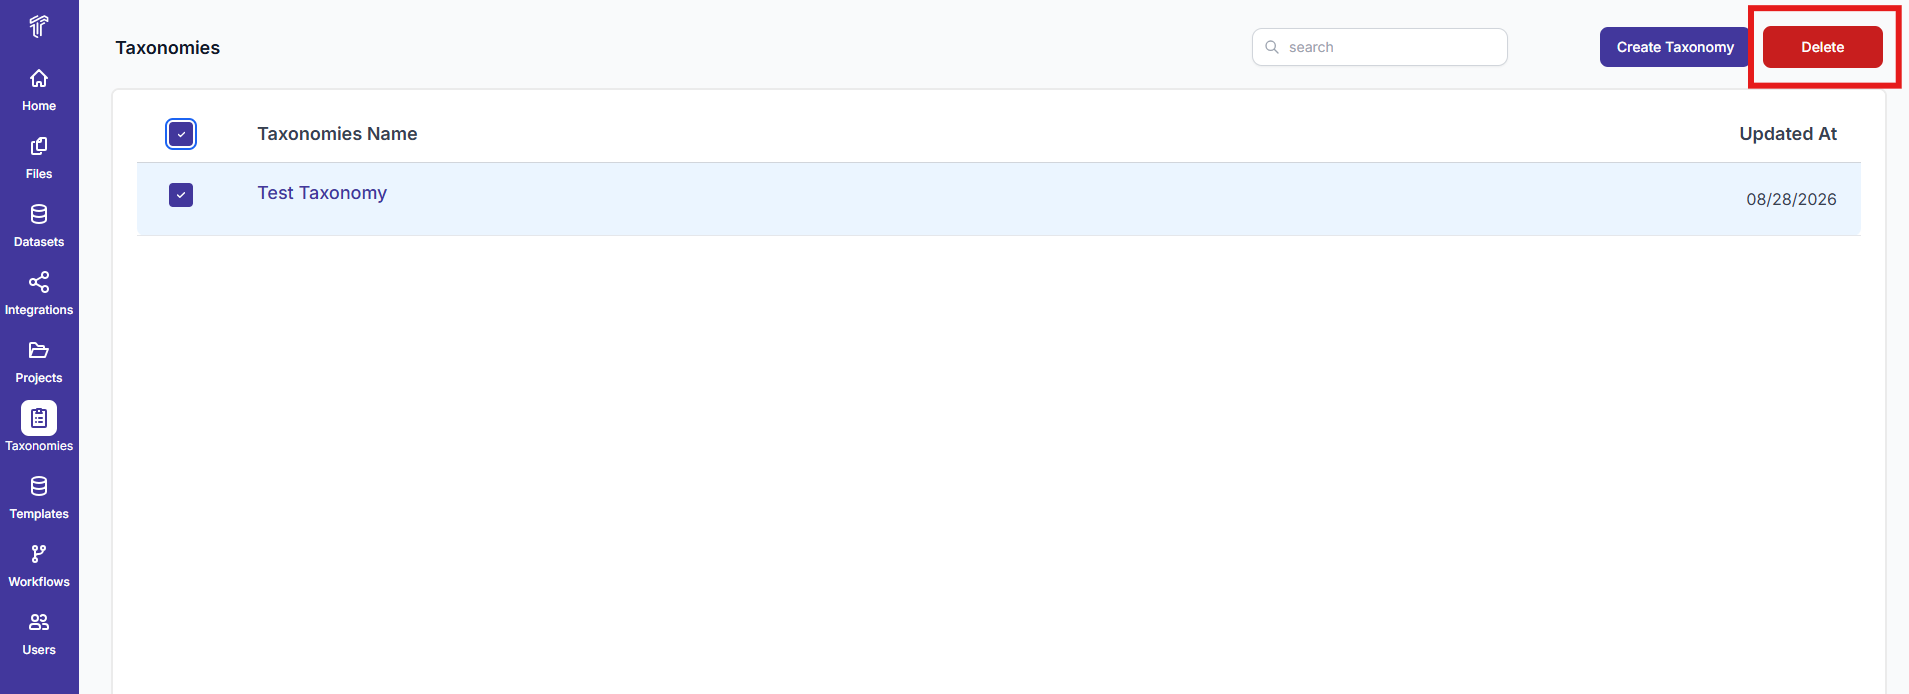
Figure 48: Taxonomy - Delete Action
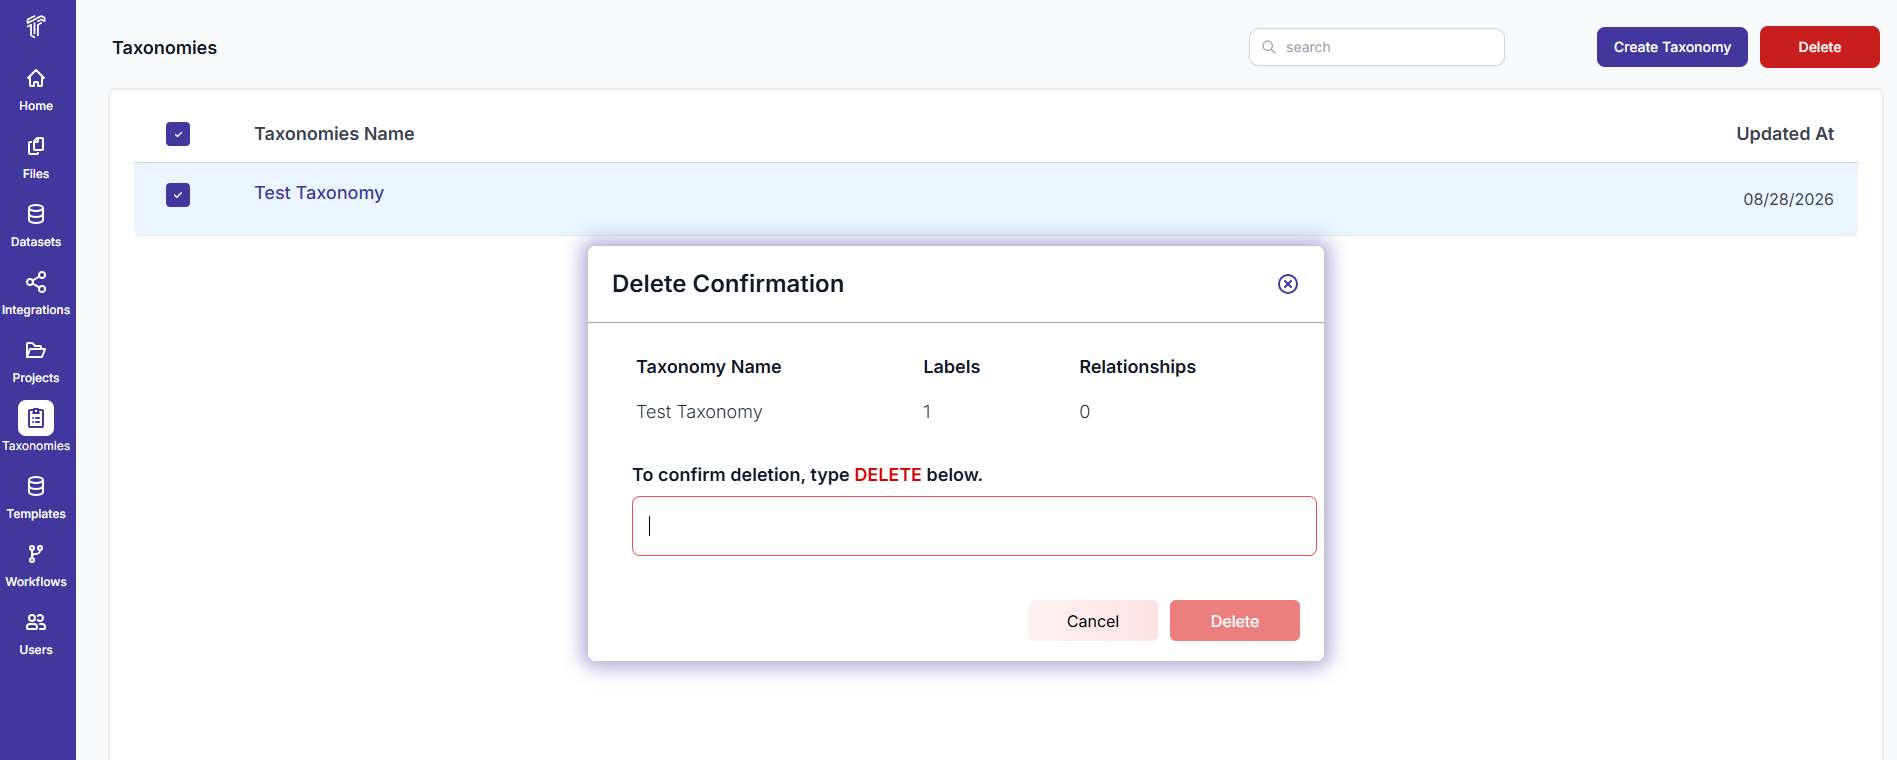
Figure 49: Taxonomy - Delete Confirmation
Viewing Taxonomy Details
When a user clicks on any taxonomy in the list, an interactive Details Panel slides open automatically on the right side of the page, displaying:
- Taxonomy Name: The name of the selected taxonomy.
- Labels: All defined label classes with colors and aliases.
- Relationships: Configured relationships (or "No relationships found" if none exist).
- Close Panel: Click the Close (X) icon at the top right to dismiss the panel.
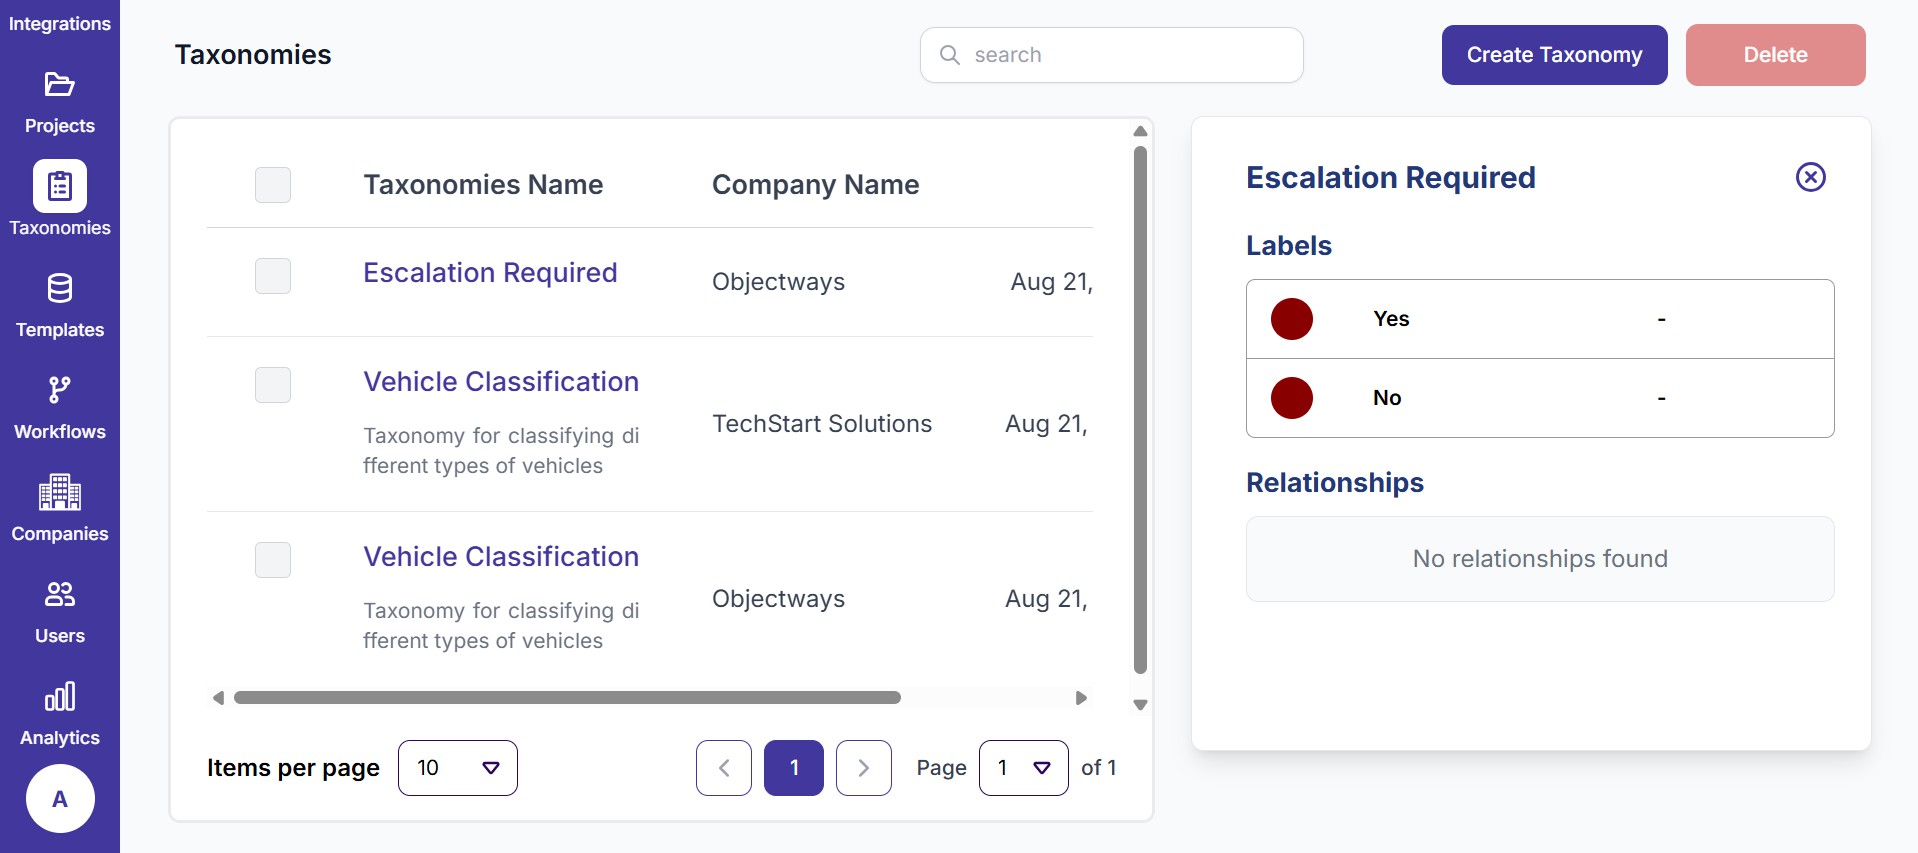
Figure 50: Taxonomy - Details Panel
Taxonomies in the Annotation Task
- When an annotator opens a task, the taxonomy is displayed in a collapsible panel positioned directly above the file viewer.
- If a Default label is configured, it is pre-selected upon task opening. Annotators can change this selection at any point during labeling.
- The taxonomy panel functions independently from the task's visual annotation template.
Workflow Routing via Taxonomies
Taxonomy values can dynamically control a task's journey through the workflow. When a task is submitted, downstream Plugin nodes receive the user's taxonomy selection to trigger conditional branching.
Yes and
No. During labeling, the annotator selects one based on task ambiguity. Once submitted to a
downstream Plugin node, the connected external Python agent inspects this selection: selecting "Yes"
routes the task to an Senior Reviewer queue, while selecting "No" routes it directly to Completion.