Object Detection
Object detection involves identifying and localizing objects of interest within an image by drawing bounding boxes around them and assigning appropriate labels.
In object detection, keypoints are typically used to detect and locate specific parts of an object or human body, such as facial landmarks, joints, or keypoints representing body parts like the shoulders, elbows, and knees.
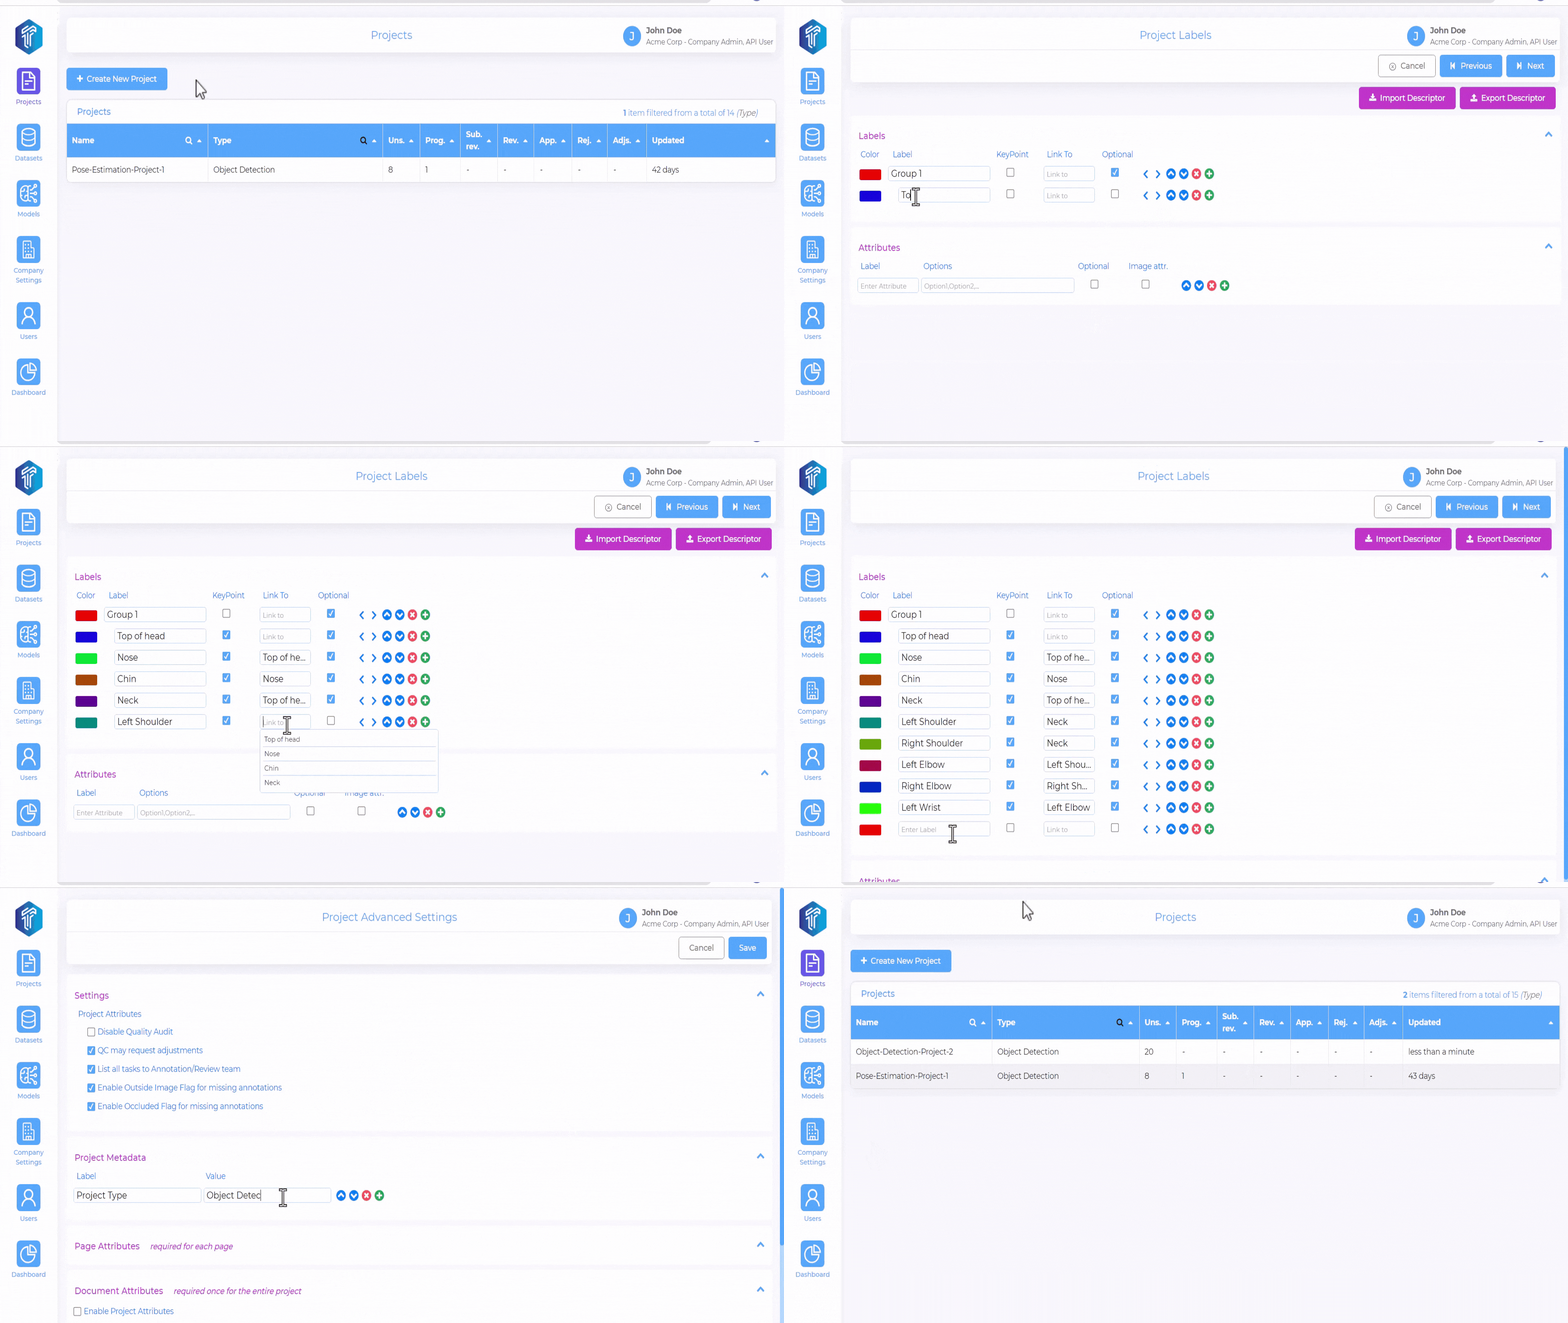
To get started, refer below for a quick overview of the Object Detection project creation process.

For details about the project creation process, refer to Getting Started.
Labels and Relationships
Labels
Add a list of label classes to assign to the objects.
Add keypoint categories to assign to the keypoints.
Attributes
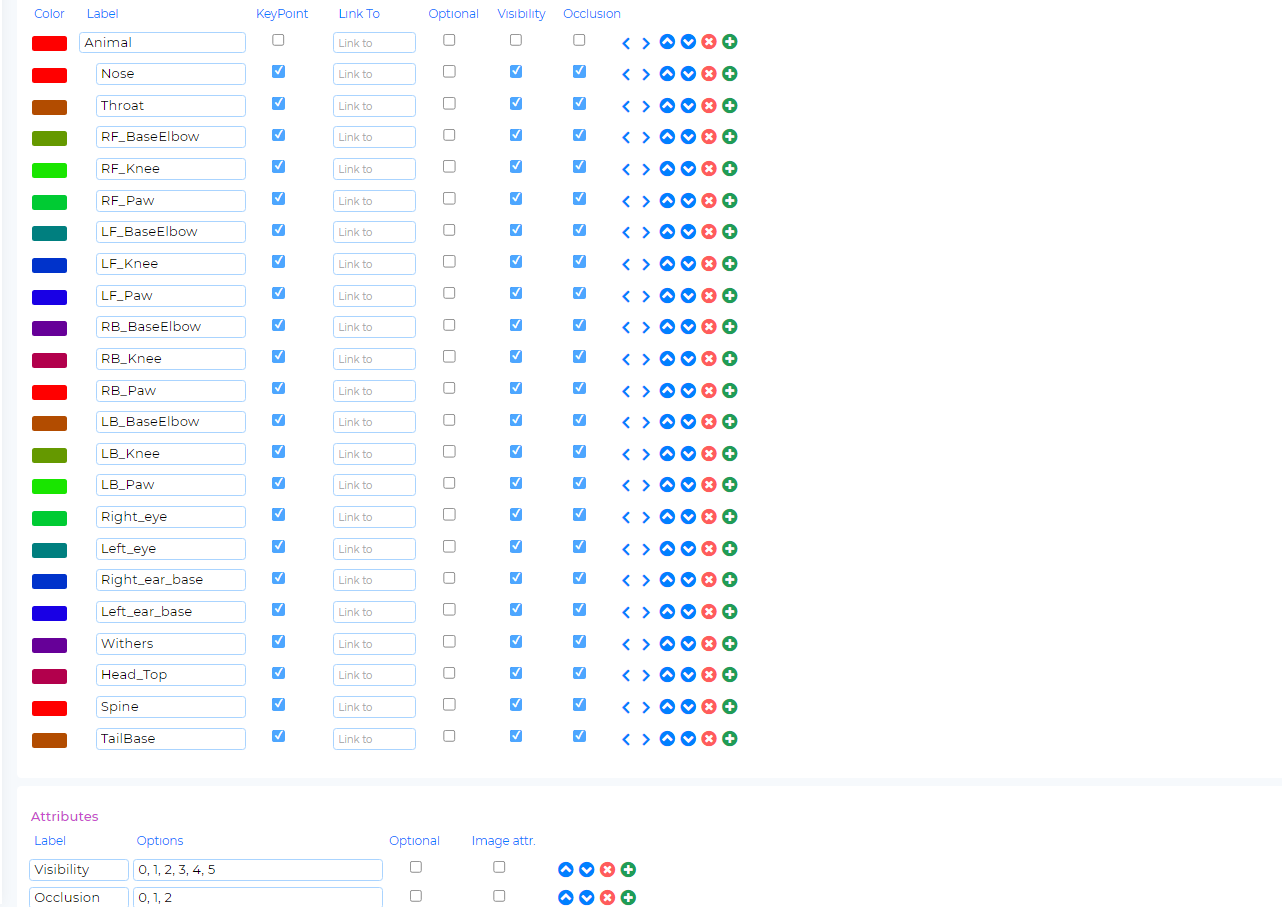
Attributes can be set for additional information beyond the object’s class label and bounding box such as visibility and occlusion.
Following is an example of label and relationship setup for an object detection project.

Advanced Settings
Project Attributes
The following Project Attribute settings are available for configuration:
Enable Outside Image Flag for missing annotations
Allows annotators to indicate missing annotations or objects that extend beyond the boundaries of the image.
Enable Occluded Image Flag for missing annotations
Allows annotators to explicitly mark or annotate regions that are difficult to discern due to occlusion.
Annotator View
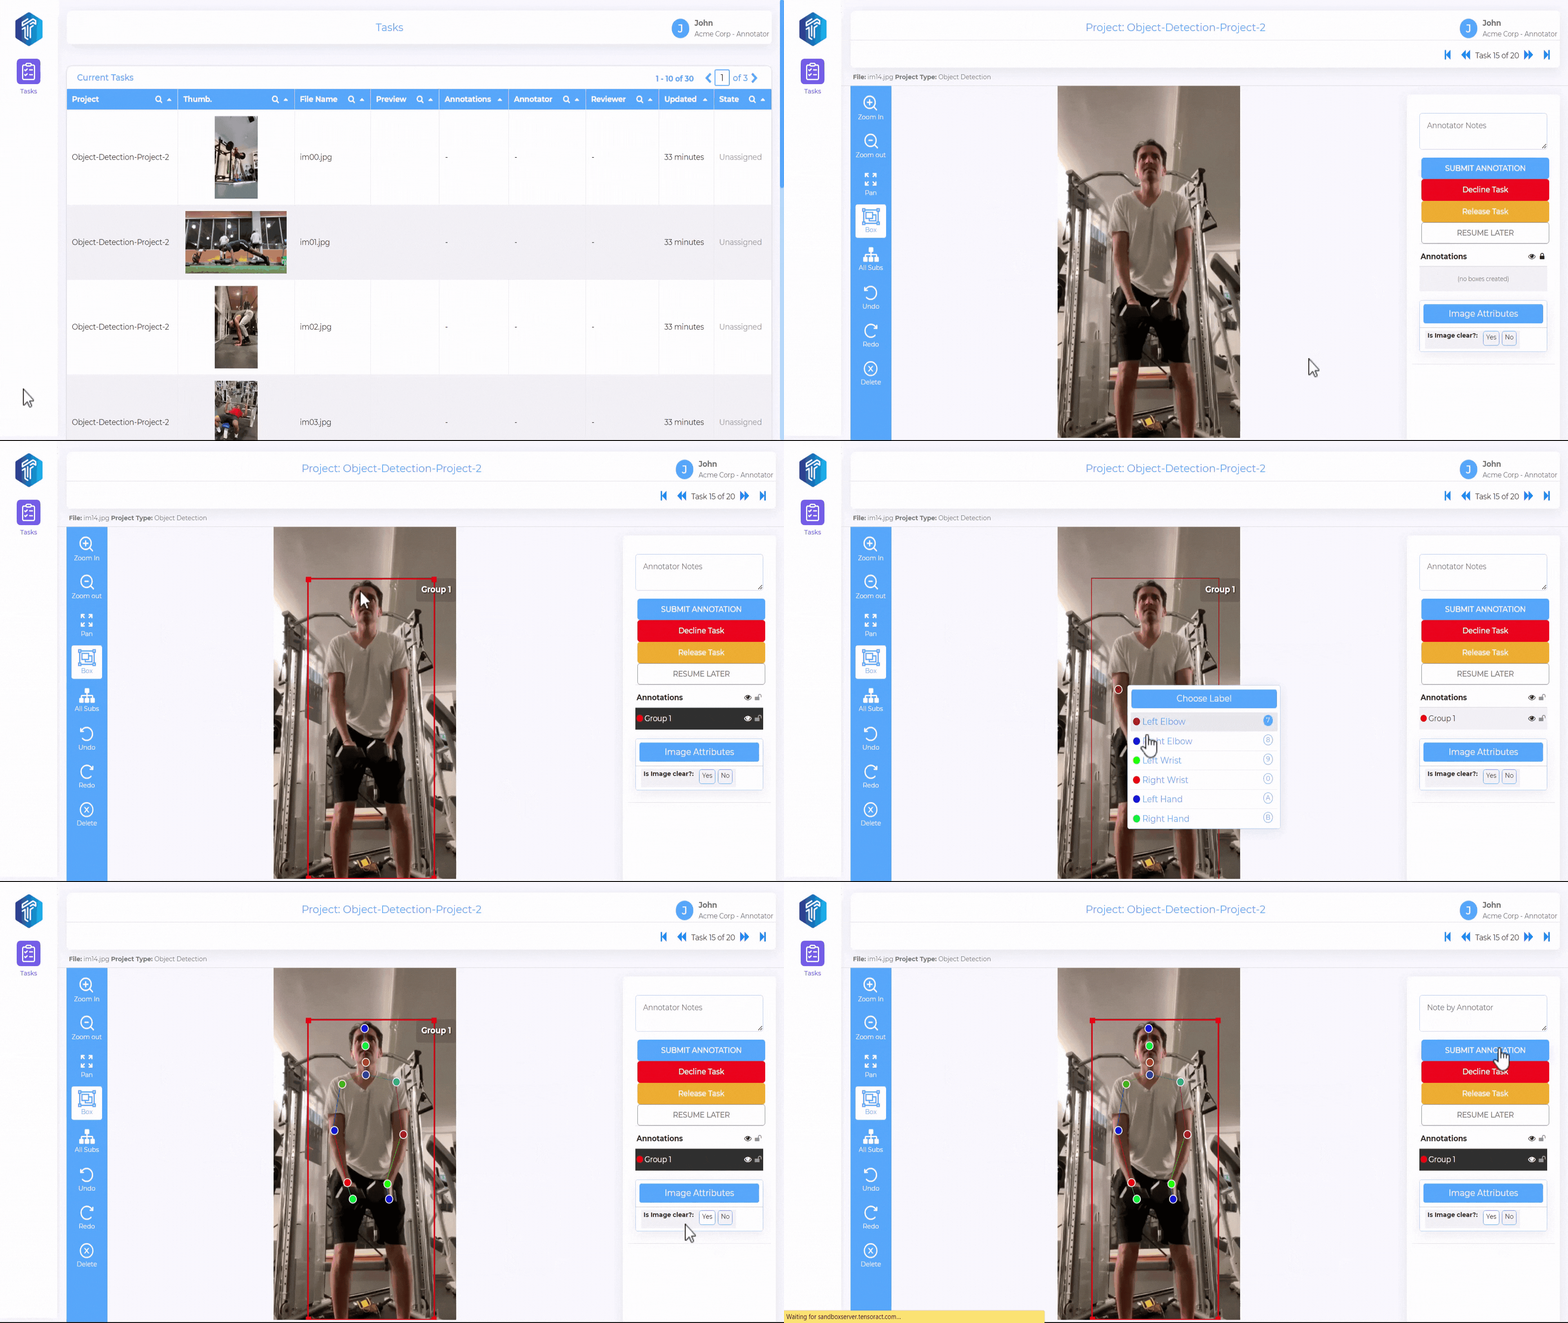
Once logged into the studio, the annotator is presented with the task queue, which includes a list of tasks available for them to work on.

Reviewer View
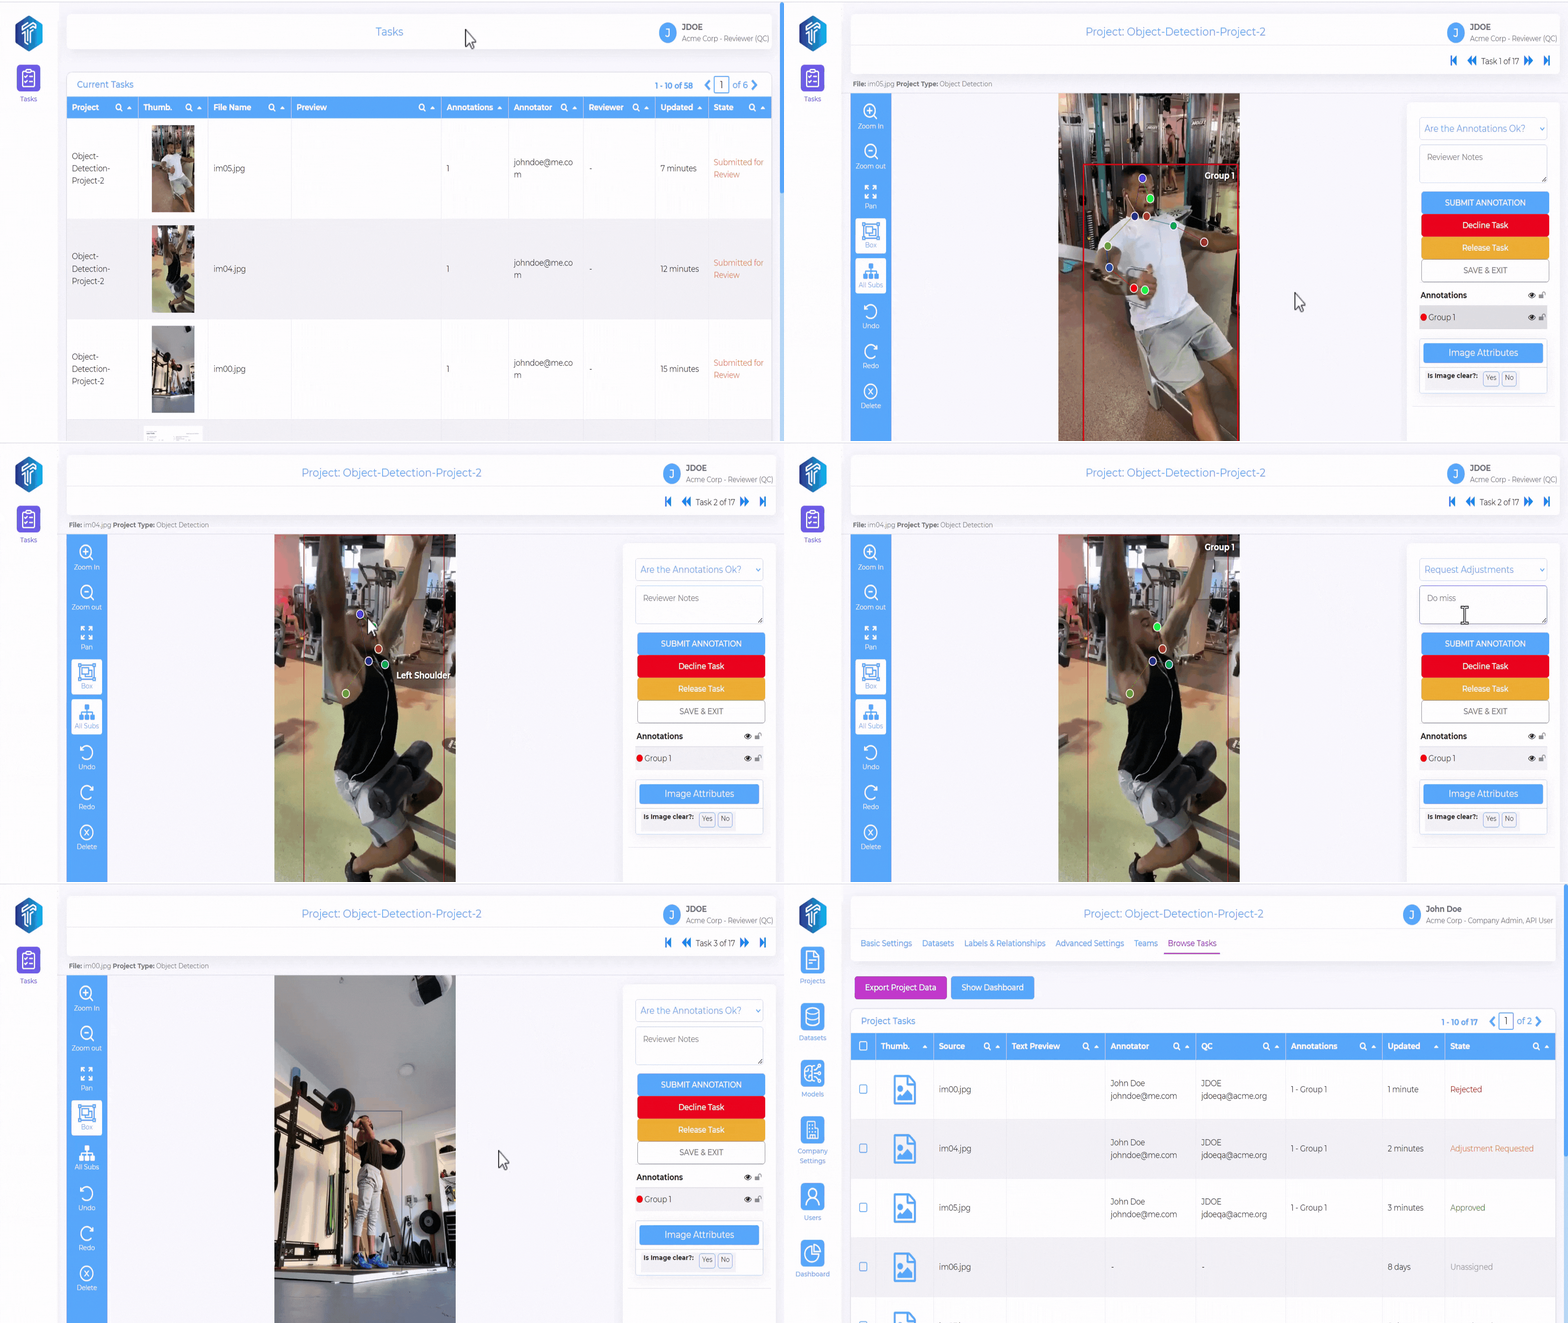
The reviewers have the authority to approve, reject, or request adjustments from the annotator for a given task. Watch the following video to get a better understanding of the QC/Reviewer view.
