Comprehend-NER
Add Description
To get started, refer below for a quick overview of the Comprehend-NER project creation process.
To access a detailed view of the project creation process, click Getting Started.
Labels and Relationships
Pre-Labeling Model
To utilize a custom pre-labeling model in a project, it must be registered within the Tensoract Studio prior to usage. Refer to Model Integration for more details.
Registered models are visible in the Pre-Labeling model and Autolabeling model drop-down menus.
Select one or more custom model(s) from the Pre-Labeling drop-down.
Once the model is selected, label classes can be mapped from model to the project. This mapping ensures that the corresponding annotations will be available within the tasks.
Auto-Labeling Models
You can also optionally select one or more Autolabeling Models to enable assistive labeling in the task.
Once the model is selected, label classes can be mapped from the model to the project. This mapping ensures that the appropriate annotations are available within the task.
Labels
You can map a list of label classes for the Pre-Labeling and Auto Labeling models selected above.
Relationsips
Add Relationship labels.
Advanced Settings
The Advanced Settings section sets the behavior of the task workflow in the current project.
Project Attributes
The following Project Attribute settings are available for configuration:
Allow Text Mode -
Enable/disable icon to highlight text in a document.
If Text option is checked, then default text mode is enabled in the task.
If Labels is checked, then default labels are displayed in the task.
Allow Table Mode -
Enable/disable toggle table mode icon in the task.
To create a table, click on the table icon in the top menu bar and select the area where the table needs to be created.
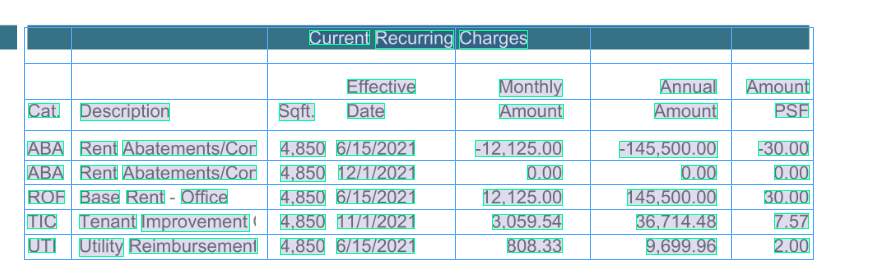
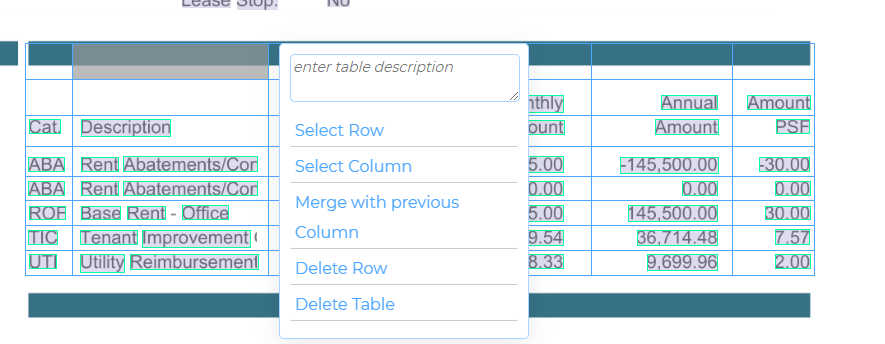
Edit table by right-clicking on cells.
Select multiple cells with a right-click.
Upon right-click, a pop-up menu shows up with following options.
Annotator View
Shortcut Keys
The following shortcut keys serve as helpful references for annotators and reviewers during the task annotation process.
Keys |
Use |
|---|---|
Ctrl + F or F3 |
Find Text |
Ctrl + G |
Find Next |
Ctrl + ] |
Move to next entity |
Ctrl + [ |
Move to previous entity |
Ctrl + } |
Move to next entity of same type |
Ctrl + { |
Move to previous entity of same type |
Ctrl + Arrow Right |
Move to next page |
Ctrl + Arrow Left |
Move to previous page |
Ctrl + |
Zoom In |
Ctrl - |
Zoom Out |
Ctrl + 0 |
Zoom Reset |
Alt |
Hide Annotations, Label popup, Relationship |
Shift + Text Select |
Hide previous annotations for inner seletions |
Ctrl + Text Select |
Select exact text (don’t expand) |
Alt + Entity Select |
Enable Entity Comment |
Delete |
Delete selected entity/relationship/box |
Once logged into the studio, the annotator is presented with the task queue, which includes a list of tasks available for them to work on.
Reviewer View
The reviewers have the authority to approve, reject, or request adjustments from the annotator for a given task. Watch the following video to get a better understanding of the QC/Reviewer view.