User Management
Tensoract Studio platform maintains user management locally, allowing only users with Company Admin role to create/update users and their respective role mappings within the platform.
Create User
Perform the following steps to create a new user:
Click on the Create User button.
Enter the necessary information, including the user’s name and email address. Providing a temporary password is optional. If not provided, the system will automatically assign a temporary password that the user must change upon their initial login. The login details will be sent to the user’s registered email address.
Click on the Add User button to create the user.
Select one or more roles to be assigned to this user and click the Add Role button. For details about the available roles and associated permissions, refer to Role Management section.
For a brief overview of the user creation process, watch the following video.

Deactivating Users
Deactivating other users is a permission limited to users with the SuperUser role. Users within the platform can solely be deactivated and not deleted. To deactivate an existing user, choose the user, uncheck the ‘User Active’ box, and click on the Update user data button.
Role Management
Users of Tensoract Studio can be assigned roles each with their specific permissions.
Company Admin - This role is associated with a company. A user with this role possesses privileges to perform all operations exclusively within that specific company. The user does not have the ability to access data or perform operations related to other companies.
Project Supervisor - This role is associated with an assigned project. A user with this assigned role has privileges to perform all operations within the scope of the project. However, the user is restricted from performing any operations beyond the boundaries of the project.
Project Viewer - This role is associated with an assigned project. A user with this role has the capability to view project dashboards and download project exports that have been exported by the Company Admin or Project Supervisor.
Annotator - The annotator is responsible for carrying out the task annotation and submitting it.
Reviewer (QC) - A user with Reviewer role assesses the task annotations provided by annotators. The reviewer has three options for handling the tasks: approving them, rejecting the annotations, or sending the task back to the annotator for modifications.
Dataset Supervisor - This role is linked to an assigned dataset and possesses privileges to perform all operations exclusively at the dataset level. However, it is restricted from performing any operations beyond the boundaries of the dataset.
Dataset Viewer - Assigned to a specific dataset, this role allows dataset viewers to view and compare model runs, as well as download the corresponding exports.
API User - This role grants users the ability to generate an API Key and invoke the Tensoract APIs. It is essential to note that the API User role can only be assigned to individuals with either ‘Company Admin’ or ‘Supervisor’ roles.
Refer to the following table for the mapping of user roles and their associated permissions:
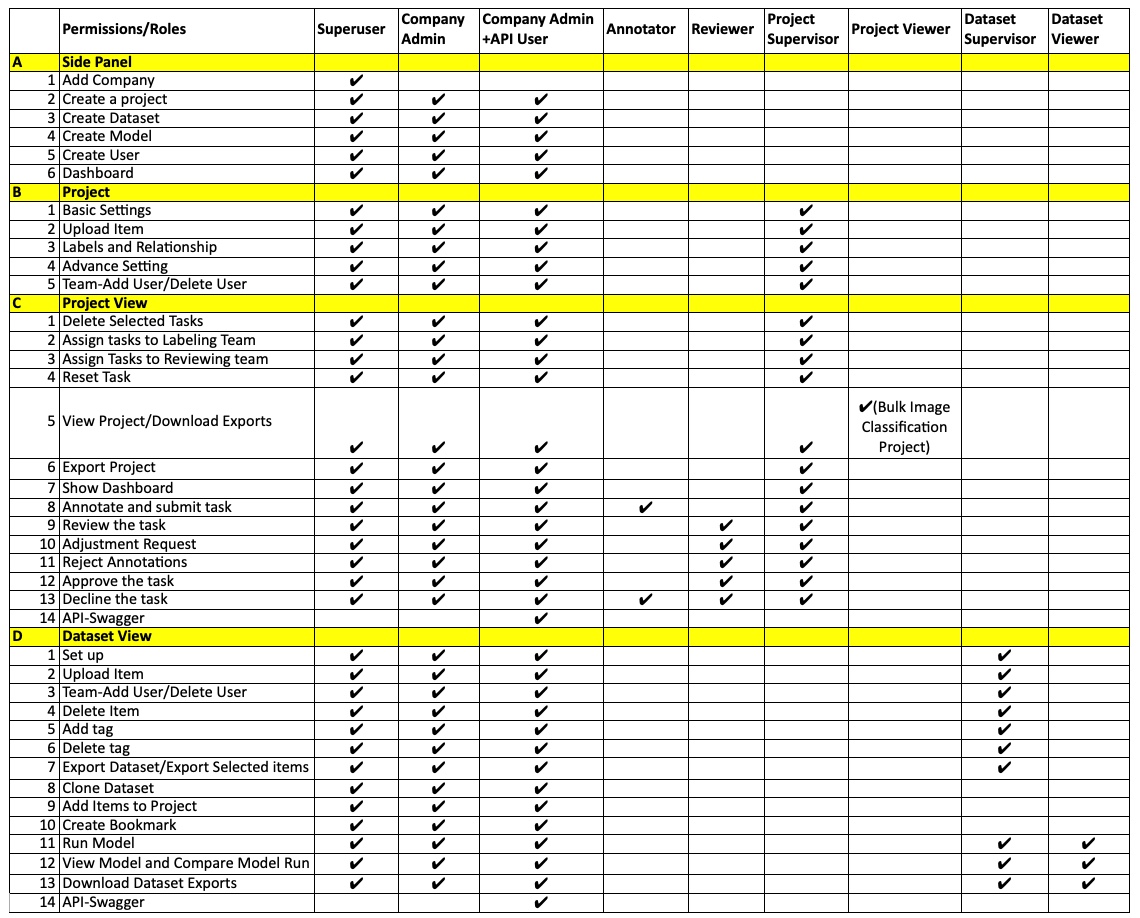
Note
When assigning roles such as Project Supervisor, Project Viewer, Dataset Supervisor, and Dataset Viewer, it is important to verify that the project or dataset exists within the system. If they do not exist, you will need to create them beforehand. Additionally, ensure that each individual is appropriately assigned to their respective project or dataset.
Assigning a new role to user
Company Admins can assign a new role to a user. Refer to the follwoing steps to assign a new role to an existing user.
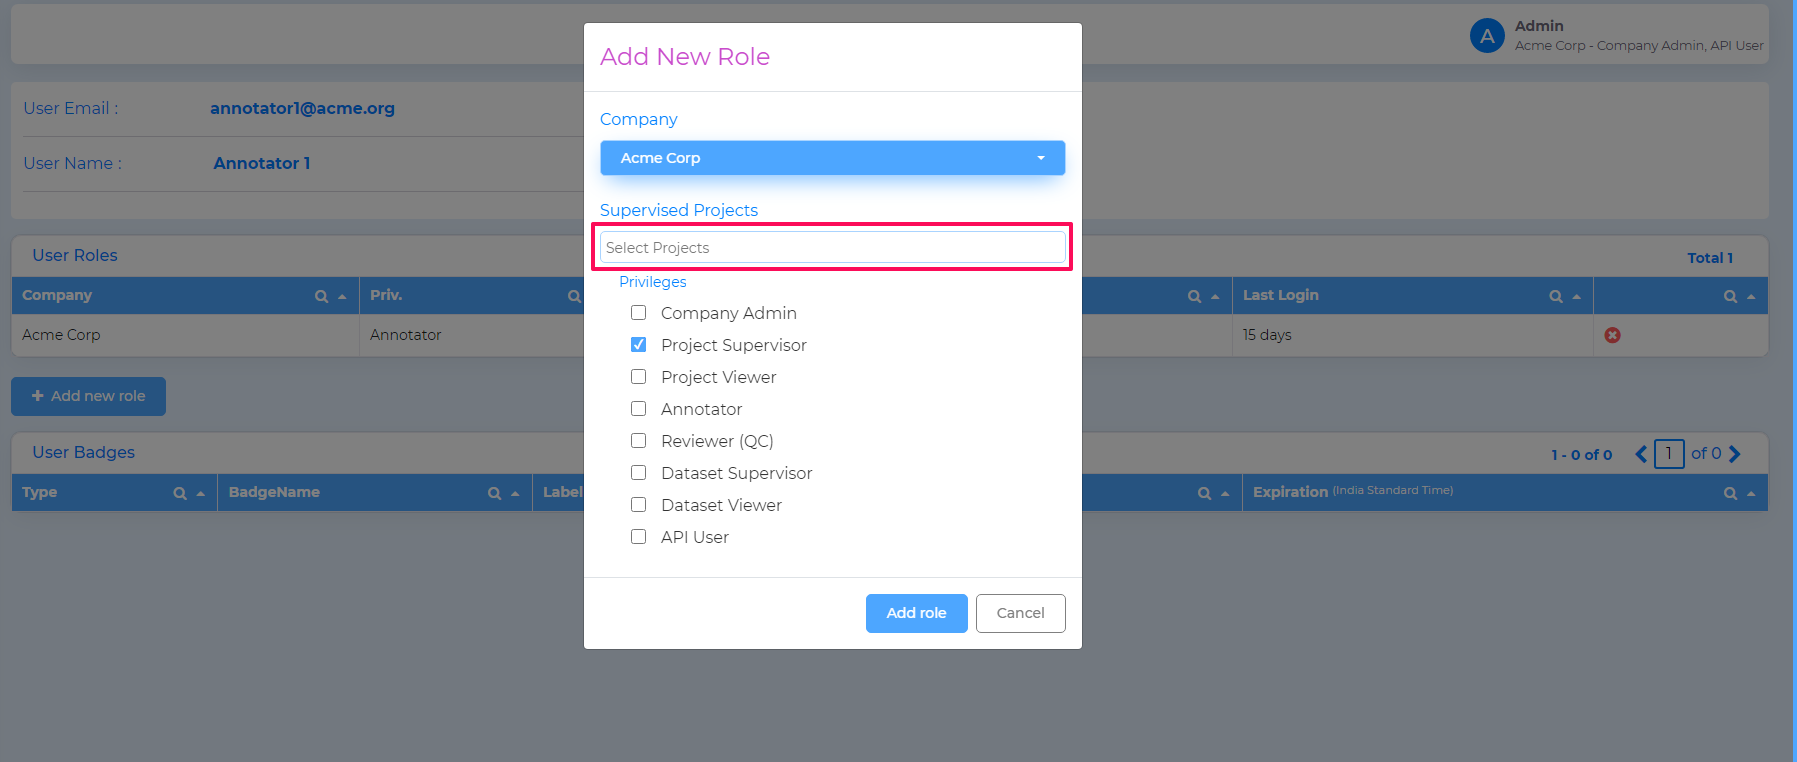
Select the user from User Management section to go to Edit User page. Click the Add new role button.
Select appropriates roles from the list and click Add role.
When assigning a Project or Dataset specific role, it is necessary to select the corresponding Project or Dataset for which the role should be applied.
Deleting a user’s role
System Admins can delete a role assigned to a user. To delete a role assigned to an user, select the user to go to Edit User page. Click the ‘✖’ mark against the user role that needs to be deleted.
Switching Roles
If a user is assigned multiple roles, they can switch between the assigned roles using the ‘Change role’ feature as shown below:
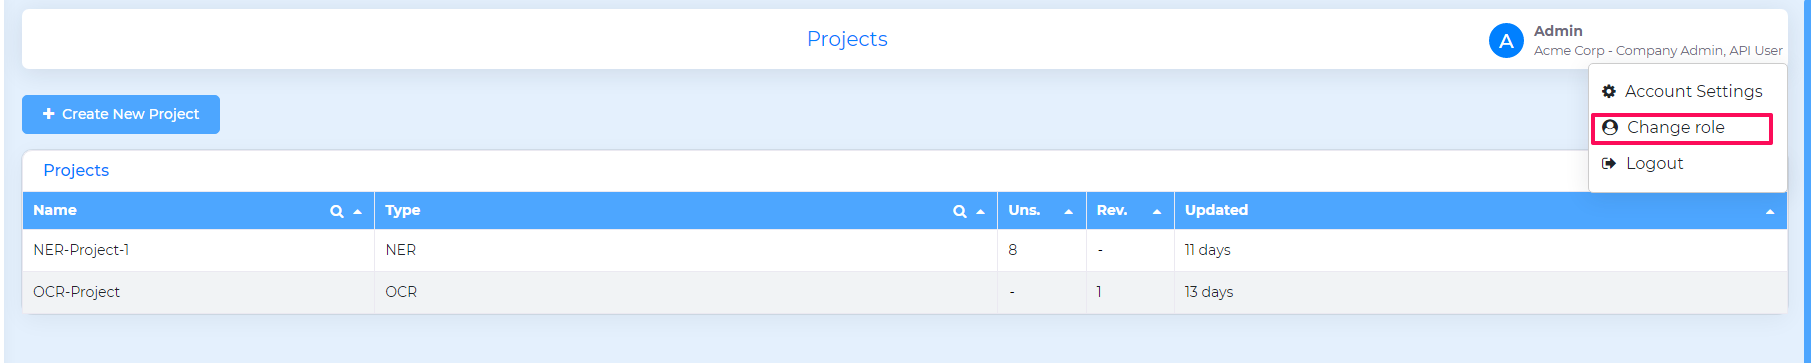
The current role of the user is displayed in the top right hand corner.

Changing Password
Users can change their own passwords by clicking the Account Settings option.

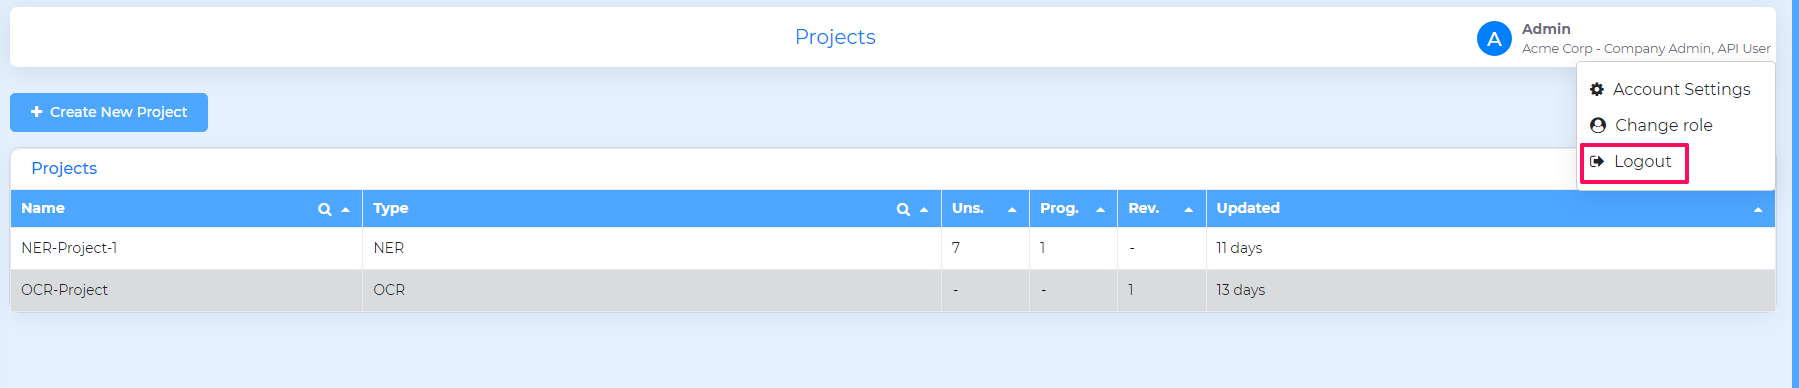
Logging out
Users can explicitly log out of Tensoract Studio by clicking “Logout” option.
Lock and Release Feature
To avoid multiple users claiming the same task, Tensoract Studio incorporates an exclusive lock and release feature implemented as follows:
By accessing the Advanced Settings section on the Projects page, the company admin can enable the “List all tasks to Annotation/Review team” option. Enabling this option will provide annotators and reviewers with visibility to all tasks upon log in.
Upon logging in, annotators can only select tasks that are in Unassigned state.
When an annotator picks up an Unassigned task, the task’s status is modified to In Progress.
The lock feature ensures that tasks being worked on by a specific annotator are exclusively accessible to that annotator alone. During the task’s progress, other annotators, as well as the Reviewer, Company Admin, and Project Supervisor, are unable to claim or access the task.
In the event that an annotator needs to release a task after or during annotation, they have the option to do so. Releasing the task will delete any temporary annotations made by the annotator and change the task’s state back to Unassigned.
For a brief overview of the lock and release process, watch the following video:
Following table illustrates the correlation between the Task States, Roles, and the locking mechanism:
Task State / Roles |
Company Admin |
Annotator |
Reviewer |
Project Supervisor |
|---|---|---|---|---|
Unassigned |
Can claim as Annotator |
Can claim as Annotator |
Locked |
Can claim as Annotator |
In Progress |
Locked |
Tasks that are “In Progress” state are accessible only to the assigned annotator |
Locked |
Locked |
Submitted for Review |
Can claim as Reviewer |
Locked |
Can claim as Reviewer |
Can claim as Reviewer |
In Review |
Locked |
Locked |
Tasks that are “In Review” state are accessible only to the assigned reviewer |
Locked |
Approved |
Can claim as Reviewer |
Locked |
Locked |
Can claim as Reviewer |
Adjustment Requested |
Locked |
If a task is returned to an annotator, only the orignal annotator can retrive and work on the task again |
Locked |
Locked |
Rejected |
Can claim as Reviewer |
Locked |
Locked |
Can claim as Reviewer |
Declined |
Can claim as Reviewer |
Locked |
Locked |
Can claim as Reviewer |
Submitted |
Can claim as Annotator |
Locked |
Locked |
Can claim as Annotator |
User Badges
Admin sets Badges in Training and Qualification Projects (Bulk Image Classification).
When an Admin adds an Annotator to a Training Project, the training badge will be assigned to the Annotator.
Label of Annotator is AssignedTraining.
After completing the training by annotator,Label will get changed to Completed
When Admin add Annotator to Qualifictaion Project ,this qualification Badge will get assigned to Annotator.
Labels assigned to Annotator is AssignedQualification
Based on Annotators score, Label of the Annotator gets Changed to Passed or Failed
To see this assigned labels to users,click Users and Edit User page will appear.Click User Name and there is Tabel User Badges having all summary of Badges with respect to the User.