Optical Character Recognition(OCR)
Optical Character Recognition (OCR) involves the identification, categorization, and labeling of relevant information (referred to as entities) in the document. Tensoract Studio offers a range of features and settings to significantly enhance the effectiveness of OCR tasks.
Note
To interact programmatically with https://studio.tensoract.com , follow the API Guide
To get started, refer below for a quick overview of the OCR project creation process. Further details for each step are provided in subsequent sections on this page.
Create Project
On the Projects menu in left-side navigation pane, Click Create New Project.
Enter a unique Project Name and a relevant Project Description.
On the project type drop-down, select OCR and Click Next. You are navigated to Project Datasets page.
Project Datasets
There are 3 ways to add datasets to your project:
Select previously created datasets to be added in the current project.
Add dataset items through Global Search.
Select specific set of items from dataset by using dataset item filters.
Labels and Relationships
Pre-Labeling Model
To utilize a custom pre-labeling model in a project, it must be registered within the Tensoract Studio prior to usage. Refer to Model Integration for more details.
Registered models are visible in the Pre-Labeling model and Autolabeling model drop-down menus.
Select one or more custom model(s) from the Pre-Labeling drop-down.
Once the model is selected, label classes can be mapped from model to the project. This mapping ensures that the corresponding annotations will be available within the tasks.
Table & Key/Value Detection Models
If a pre-labeling model is not selected, the options of Table Detection Model and Key/Value Detection Model are available for selection.
For Table Detection, use AWS Textract Table Detection Model.
For Key/Value Detection, use AWS Textract Key/Value Detection Model.
Upon selecting Table and Key/Value Detection models, following options become available for Textract processing:
Enable key value pairs dictionary is used to enable dictionary mapping to labeling classes.
Dictionary:match keys only match the dictionary patterns with the extracted key. The default patterns matches the key and value pairs.
Dictionary:ignore non matching key-value pairs ignores non matching key value pairs.
Auto-Labeling Models
You can also optionally select one or more Autolabeling Models to enable assistive labeling in the task.
Once the model is selected, label classes can be mapped from the model to the project. This mapping ensures that the appropriate annotations are available within the task.
Labels
You can map a list of label classes for the Pre-Labeling and Auto Labeling models selected above.
Advanced Settings
The Advanced Settings section sets the behavior of the task workflow in the current project.
The following options are available in the ‘Advanced Settings’ page:
Project Attributes
The following Project Attribute settings are available for configuration:
Allow Text Mode -
Enable/disable icon to highlight text in a document.
If Text option is checked, then default text mode is enabled in the task.
If Labels is checked, then default labels are displayed in the task.
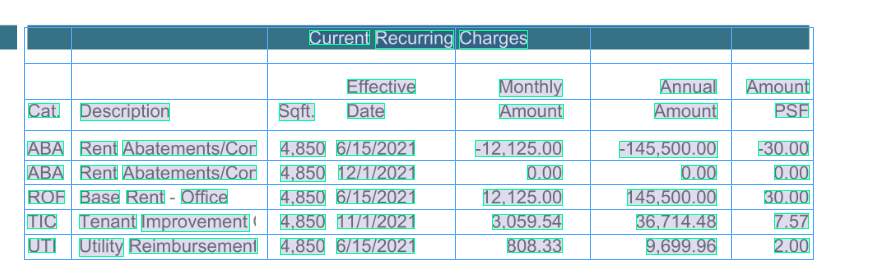
Allow Table Mode -
Enable/disable toggle table mode icon in the task.
To create a table, click on the table icon in the top menu bar and select the area where the table needs to be created.
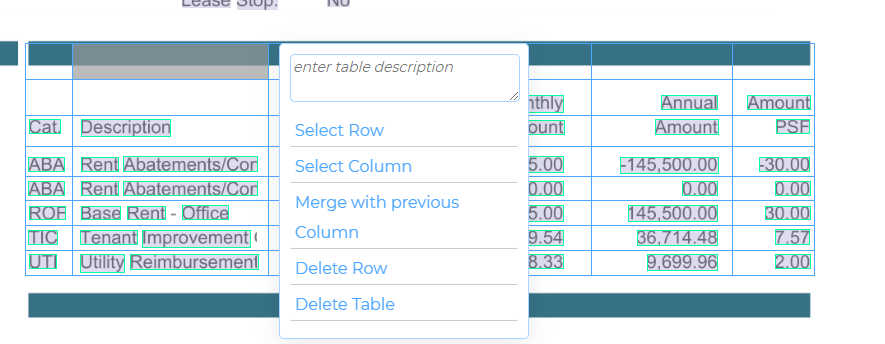
Edit table by right-clicking on cells.
Select multiple cells with a right-click.
Upon right-click, a pop-up menu shows up with following options.
Disable Quality Audit
If checked, then quality review is disabled in the workflow. The task transitions directly to Submitted state.
QC may request adjustment
The option is visible if the Disable Quality Audit option is unchecked. When the QC may request adjustment is unchecked, then below two options are available for the reviewer to choose in the task.
Annotations are ok - when reviewer selects this option, the task is transitioned to Approved state.
Reject annotations - when reviewer selects this option, the task is transitioned to Rejected state.
When the QC may request adjustment option is checked, then an additional option: Request Adjustment is available for the reviewer, along with the earlier two options Annotations are ok and Reject annotations. If the reviewer opts for Request Adjustment, then task will be returned to the Annotator with Adjustment Requested status
Allow New Label input
if selected, then Add label option is available for users in the task label list. The feature enables the ability to add a new label in the task.
Allow Bounding Box Rotation
Enables ability to rotate the bounding box to match text orientation.
Disable Automatic Key-pair linking
It disables automatic linking of key value pair but users can manually link the key value pair.
List all tasks to Annotator/Review Team
Allows annotators and reviewers to browse all tasks in a project and select the task of their preference. Some tasks may be locked depending on ownership and task state.
Maximum concurrent tasks per annotator
The setting controls the maximum number of concurrent tasks assigned per annotator.
Note
When List all tasks to Annotator/Review Team setting is enabled, then Maximum concurrent tasks per annotator option is not available.
Project Metadata
You can add custom metadata key & values to the project and they available in the task, export mainifest file and project descriptor json file. This can be leveraged to track and filter useful customer metadata(e.g. Cost center) related to the project.
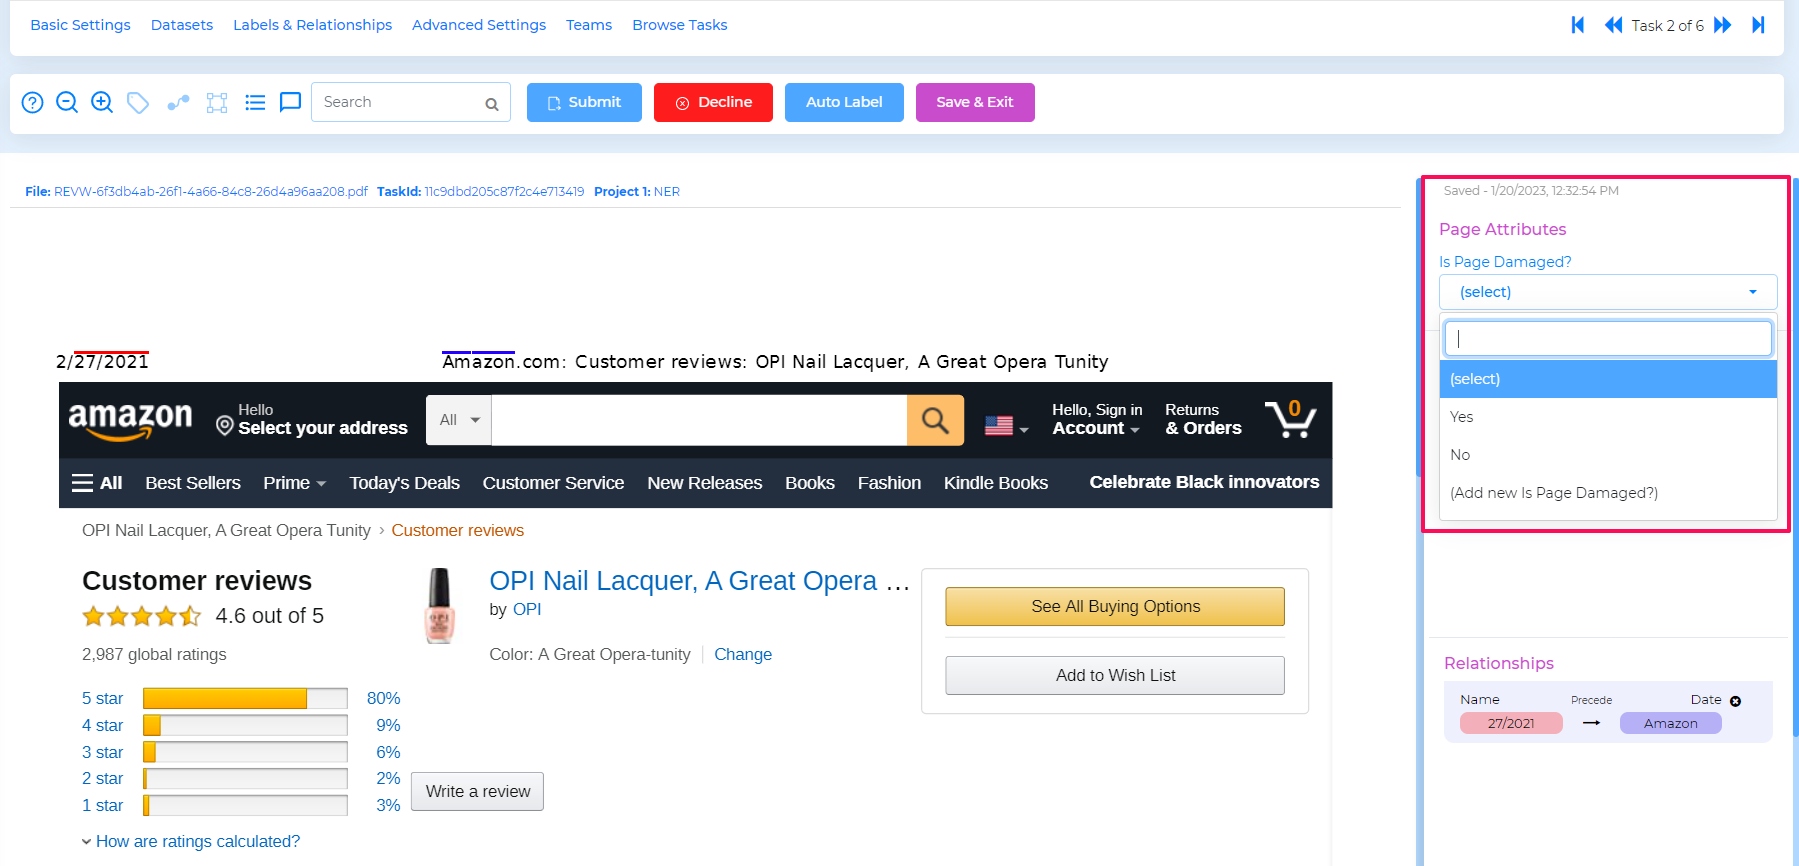
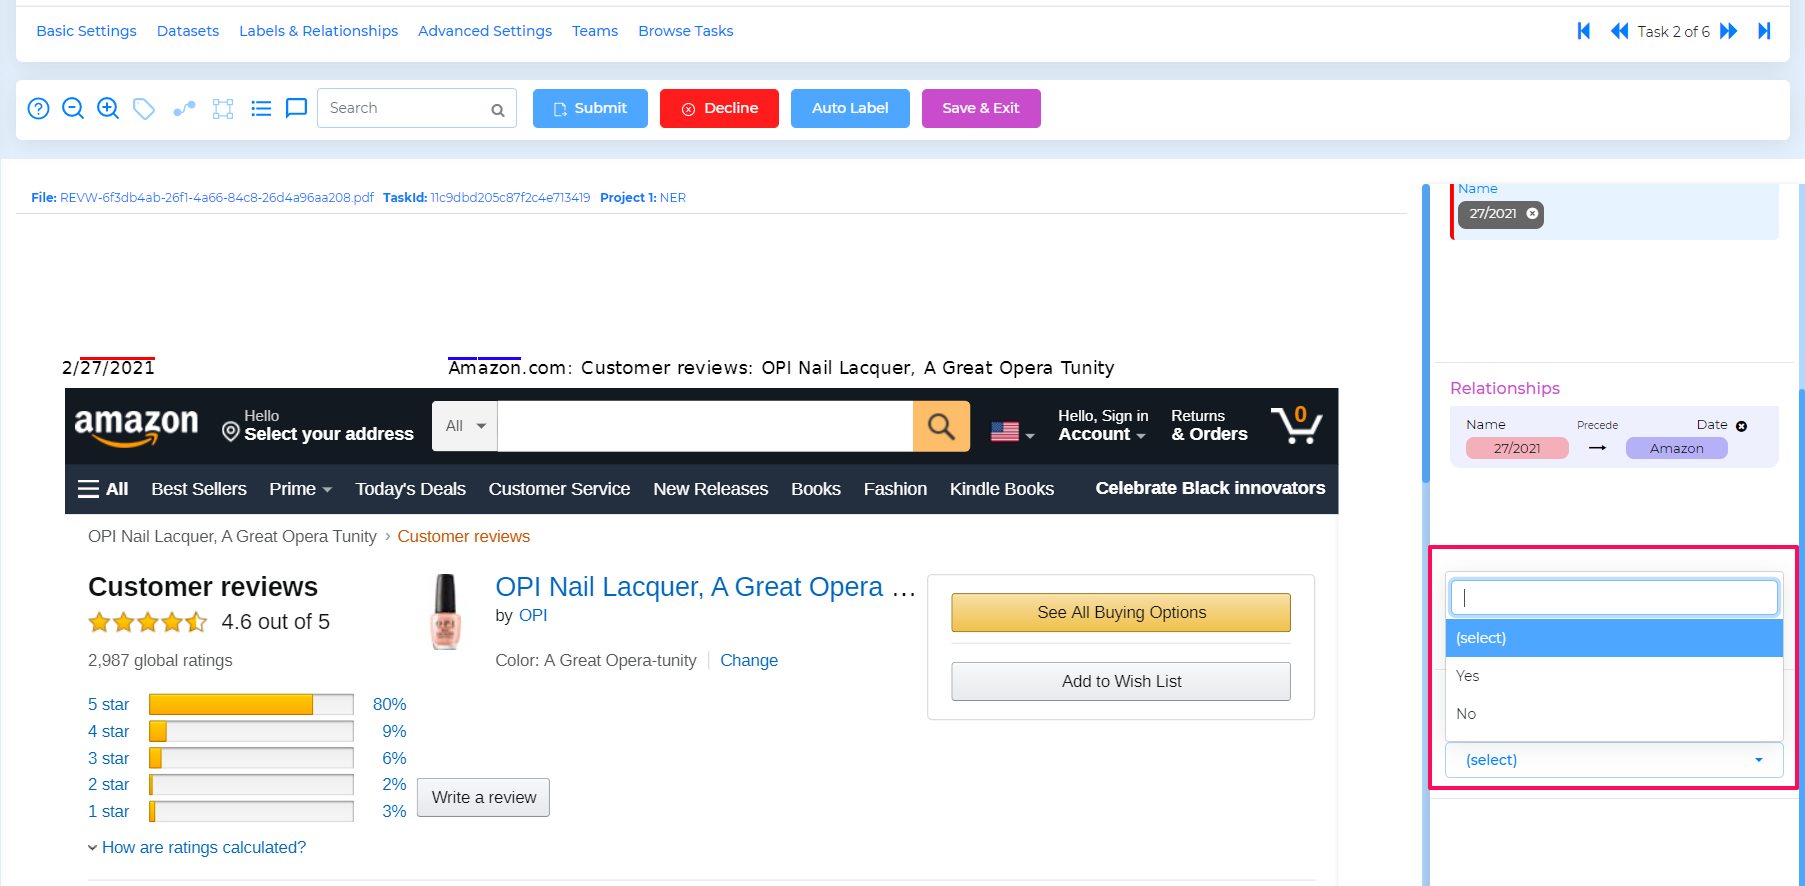
Page and Document Attributes
You can provide page or document level classification attributes.
Page attributes appears as below in the task.
Document attributes appears as below in the task.
Webhooks
Webhooks are automated messages sent to a configured server URI in response to a specific event. Currently, webhooks are supported for Task update and Project update.
Note
The user is required click Save for any changes in Advanced Settings to take effect.
After configuring the advanced settings, the user can save the project and proceed to add a project team.
Teams
You can specify the collaborators who will be assigned on the project.
Add Team member - You can select the collaborators’s name/email and the desired role from the drop-down menu. Click the Add Collaborator button to commit changes.
Delete Team member - You can click x symbol against the team member to remove them from the project.
Dataset
You can add datasets to the project. For OCR project, the compatible file formats include .pdf, .jpg, .png, .jpeg, .tif, and .tiff.
You can use following methods to add datasets to the project:
Add single or multiple datasets in the same project.
Add selected dataset items through Global Search.
Add selected dataset items from datasets view.
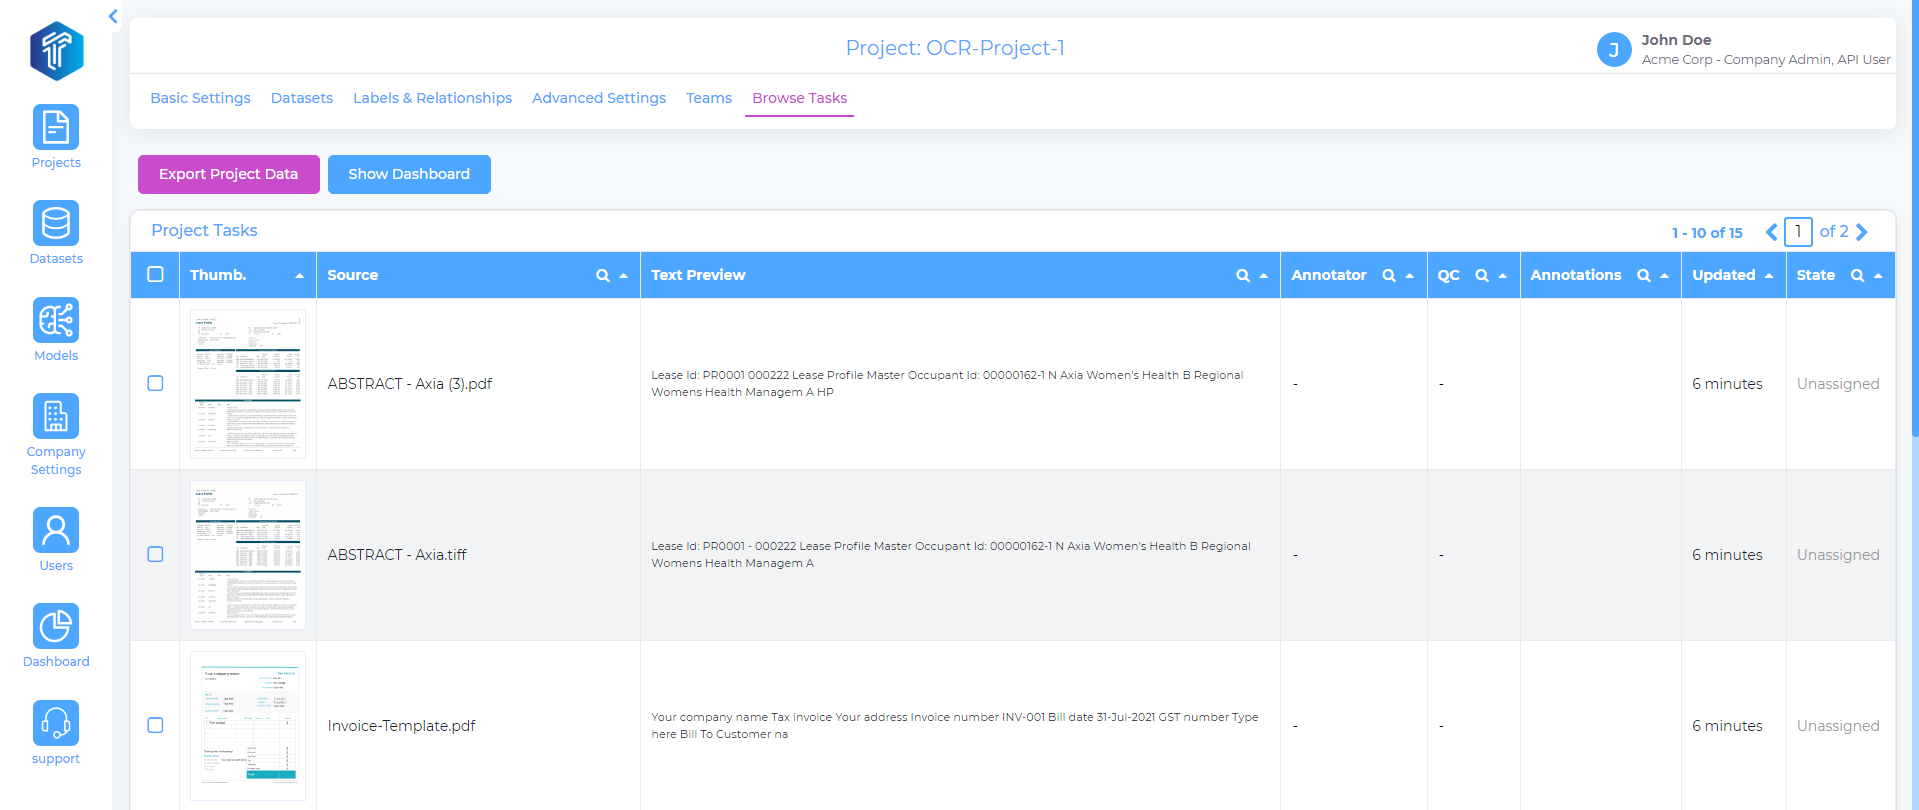
Browse tasks
The page displays a summary of tasks for the current project.
Annotator View
Shortcut Keys
The following shortcut keys serve as helpful references for annotators and reviewers during the task annotation process.
Keys |
Use |
|---|---|
Ctrl + F or F3 |
Find Text |
Ctrl + G |
Find Next |
Ctrl + ] |
Move to next entity |
Ctrl + [ |
Move to previous entity |
Ctrl + } |
Move to next entity of same type |
Ctrl + { |
Move to previous entity of same type |
Ctrl + Arrow Right |
Move to next page |
Ctrl + Arrow Left |
Move to previous page |
Ctrl + |
Zoom In |
Ctrl - |
Zoom Out |
Ctrl + 0 |
Zoom Reset |
Ctrl + Text Select |
Select exact text (don’t expand) |
Alt |
Hide Annotations, Label popup, Relationship |
Shift + Text Select |
selections |
Alt + Entity Select |
Enable Entity Comment |
Delete |
Delete selected entity/relationship/box |
Once logged into the studio, the annotator is presented with the task queue, which includes a list of tasks available for them to work on.