Named Entity Recognition (NER)
Named Entity Recognition (NER) is the task of identifying and categorizing or labelling key information (also called enitities) in a block of text document. Newton Workbench provides a number of valuable features and settings to make NER tasks highly effective.
Watch below video for a quick glimpse into NER project creation. Each step and option is detailed further below on this page.
Create Project
On the Projects menu in left-side navigation pane, Click Create New Project
Enter a unique Project Name and a relevant Project Description
On the project type drop-down, select NER and Click Next
Datasets
To use a custom prelabeling model, you have to skip this step by clicking Next and add Datasets to the project after addition of the Prelabeling model in the project.
Project Labels
In order to use a custom pre-labeling model in a project, the model needs to be first registered in the workbench.
Refer to click ModelManagement for more details.
Once the model is registered, it will be visible in the Pre-Labeling model and Autolabeling model drop-down menus.
Select the custom model from the Pre-Labeling drop-down.
After selecting the model, Labels and Relationships section will auto populate as these were defined during the custom model creation. These settings can later be accessed through the Labels & Relationships tab of the project. You can also optionally select the Autolabeling Model if it is desired to auto label the task items in the project.
Click Next to proceed.
Advanced Settings
The Advanced Settings section has some useful features which would drive the task workflow behaviour. Each setting is explained in detail below.
Note
Configuration in Advanced settings will be applicable to only the selected project.
Following are the options available in the ‘Advanced Settings’ section and each of these are explain in detail below.
Project Attributes
Each Project Attribute setting is explained below
Allow text mode
This setting enables icons in the task which would show the position of text, labels and relationships in the document, depending on the value selected in the Default toolbar checkbox values section. This setting is related to the Default toolbar checkbox values setting. If Text option is checked, then default text mode is enabled in the task. If Labels and Relationships options are checked, then default labels and relationships are displayed in the task.
Disable tag overlap
This setting either allows (when not selected) or disallows (when selected) overlapping annotations in the document.
Disable Quality Audit
If this option is unchecked, then tasks submitted by the annotator will be in Submitted for review state and has to be reviewed by the QC /Reviewer. If this option is checked, then there is no reviewer in the workflow. Upon submission by the annotator, the task will transition directly to Submitted state.
QC may request adjustment
- This option will be visible only if the Disable Quality Audit option is unchecked. When the QC may request adjustment is unchecked, then below two options are available for the reviewer to choose in the task.
Annotations are ok - when reviewer selects this option, the task will transition to Approved state.
Reject annotations - when reviewer selects this option, the task will transition to Rejected state.
When the QC may request adjustment option is checked, then an additional option: Request Adjustment is available for the reviewer, along with the earlier two options Annotations are ok and Reject annotations. If the reviewer opts for Request Adjustment, then task will be returned to the Annotator with Adjustment Requested status
Allow new label input
When this option is selected, then Add label option is available for users in the task lable list. Through this feature, the user has the ability to add a new label in the task.
List all tasks to Annotator/Review Team
If Full view is set, all tasks from the project will feature in the annotators jobs page as below. The user might view all tasks but some may be locked depending on ownership and task state.
Maximum concurrent tasks per annotator
This setting controls the maximum number of concurrent tasks that will be allotted per annotator.
Note
When List all tasks to Annotator/Review Team setting is enabled, then Maximum concurrent tasks per annotator option will not be available.
Project Metadata
Under Project Metadata, Labels and Values can be set and these metadata values will be preserved in the task, export mainifest file and project descriptor json file. This can be leveraged to track and filter useful metadata related to the project.
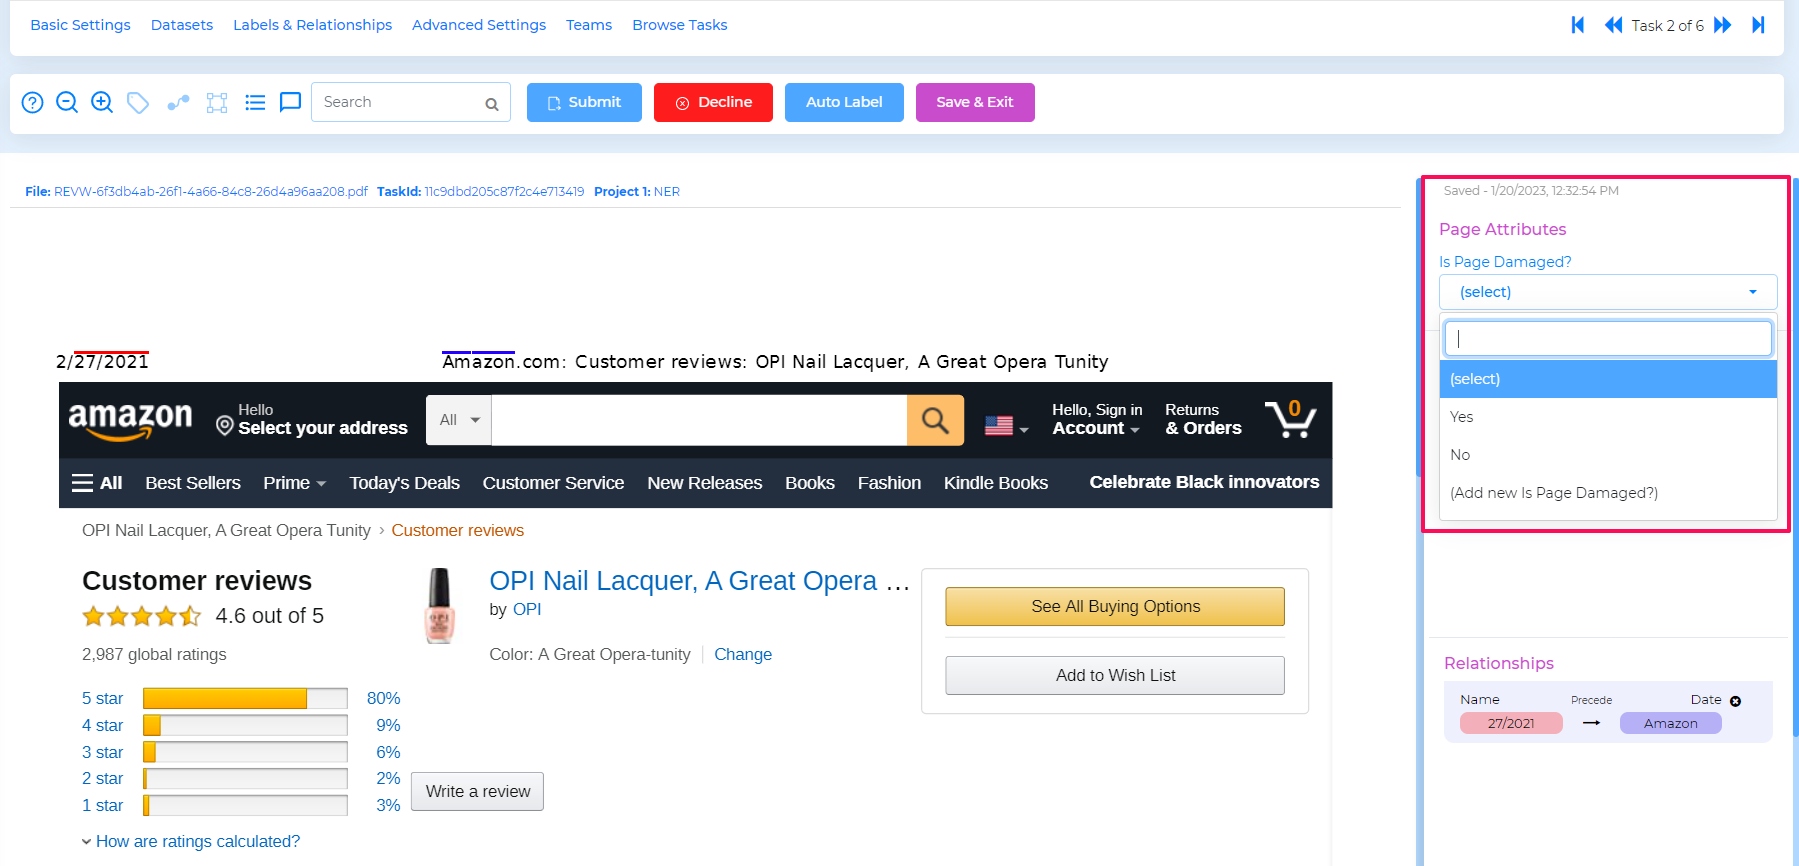
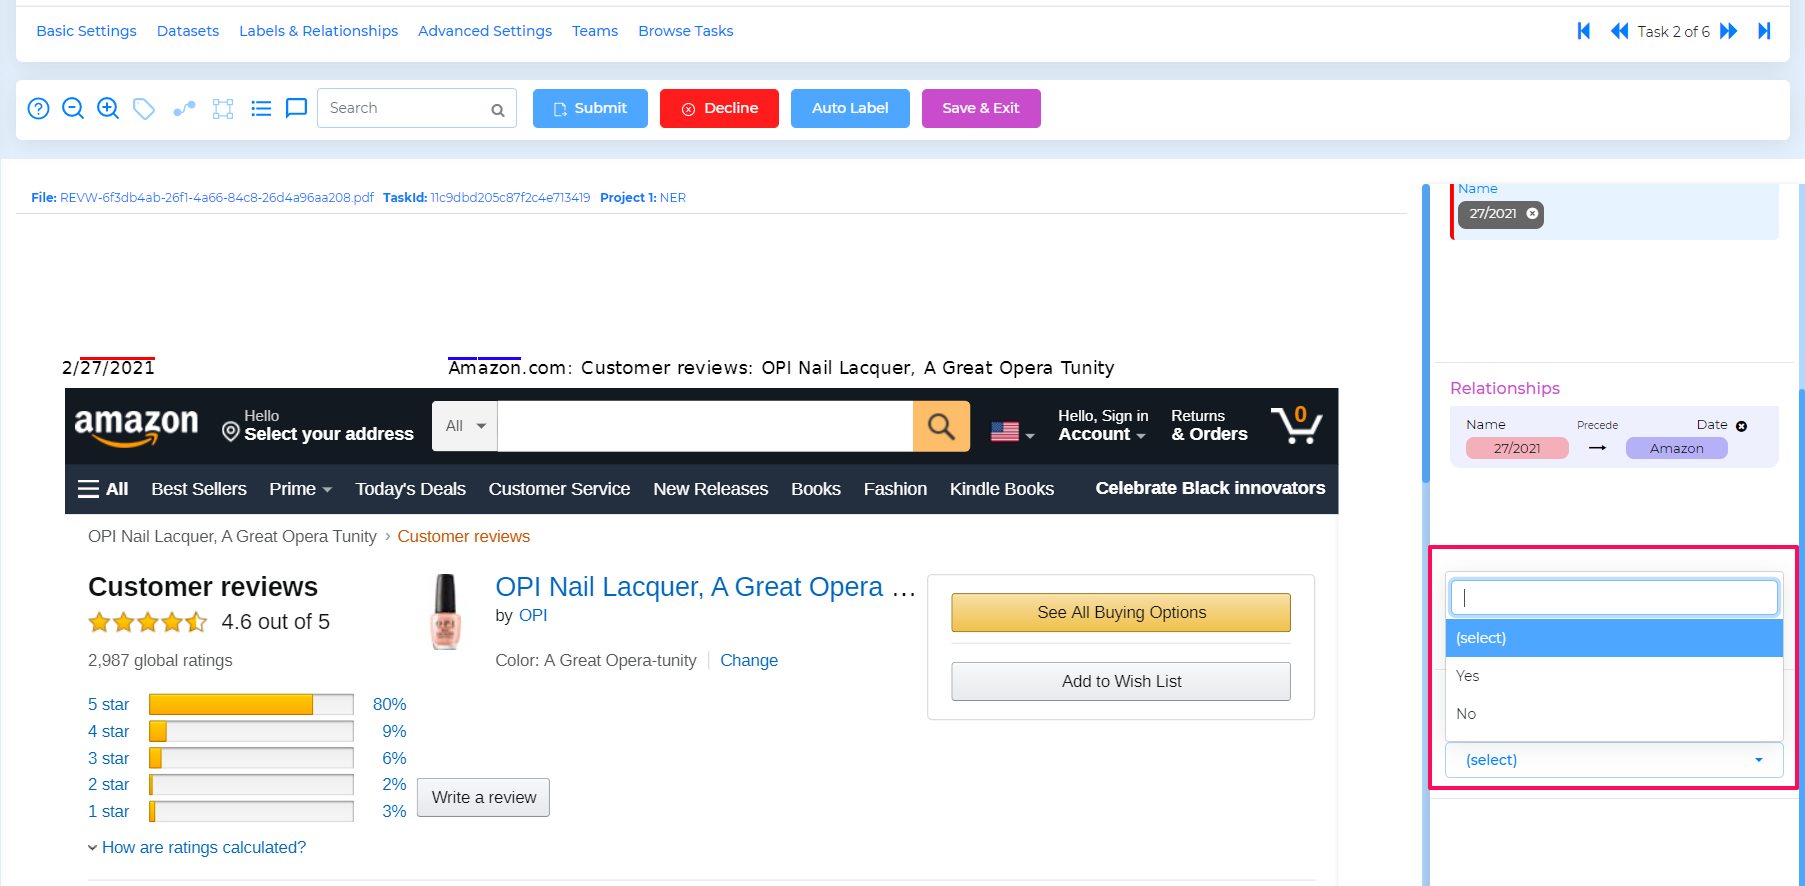
Page and Document Attribute
Through this setting, a user can provide a customized status of a page in the document or the entire document itself.
Page attribute appears as below in the task.
Document attribute appears as below in the task.
Webhook
Webhooks are automated messages that can be sent to a configured server URI in response to a specific event. Currently, webhooks are supported for Task update and Project update.
Annotation Format
There are two annotation formats available for the NER project.
ADL Default - the exported project manifest has the Offset range is limited to single page.
Absolute entity offset - the exported project manifest has the Offset range continuing for all pages.
Note
The user is required click :Save for any changes in Advanced Settings to take effect.
Teams
In this section, it is required to specify the users who are going to collaborate and work on the project tasks.
Add Team member
Enter the user-name or email-id to filter in the text box. Select the desired user.
Choose the role as Annotator, Reviewer or Supervisor
Click :Add Collaborator
Delete Team member
Click x symbol against the user you wish to remove from this project.
Click Yes to confirm and the user will get removed from the project.
Dataset
After configuring the project,upload one or more datasets in Project
To see Details of Dataset click Dataset
Here Admin can add datasets with images.
Following are the different ways of adding datasets.
Admin can add
Single or more datasets in the same project
Browsed dataset items through Global search
Browsed dataset items from dataset view
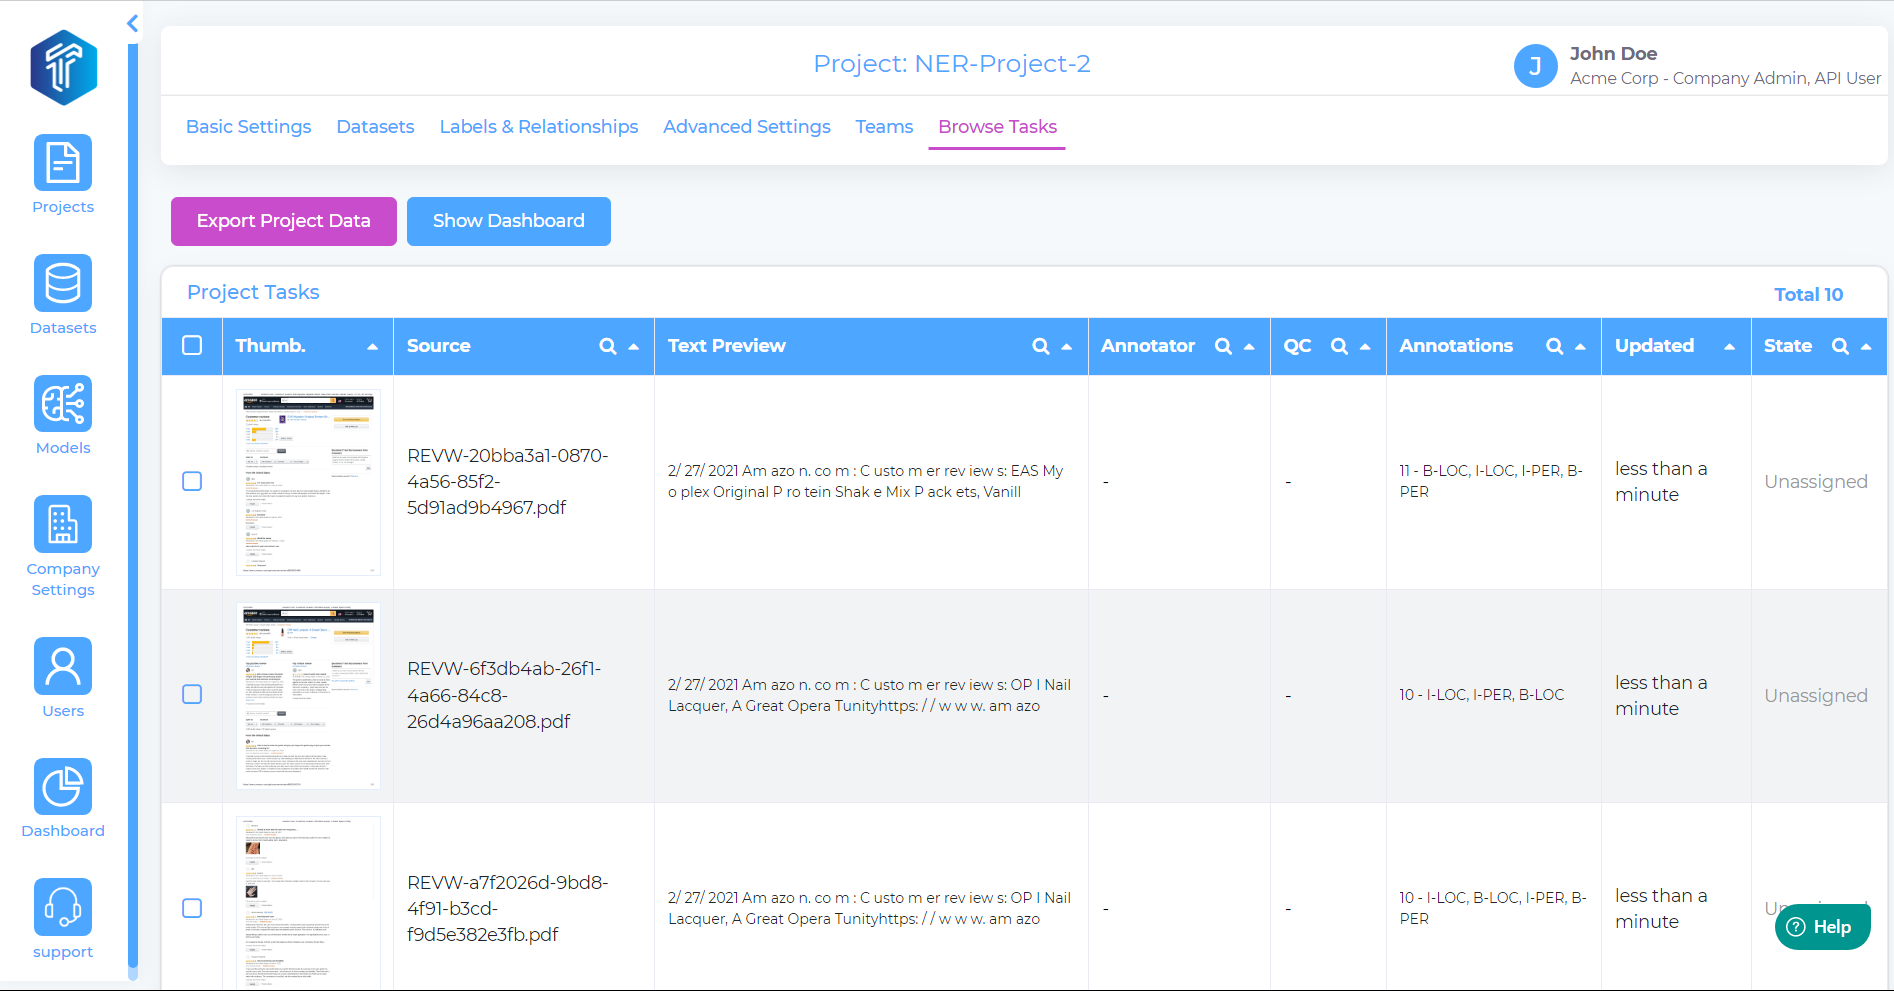
Browse tasks
This section will display a summary of tasks in the selected project.
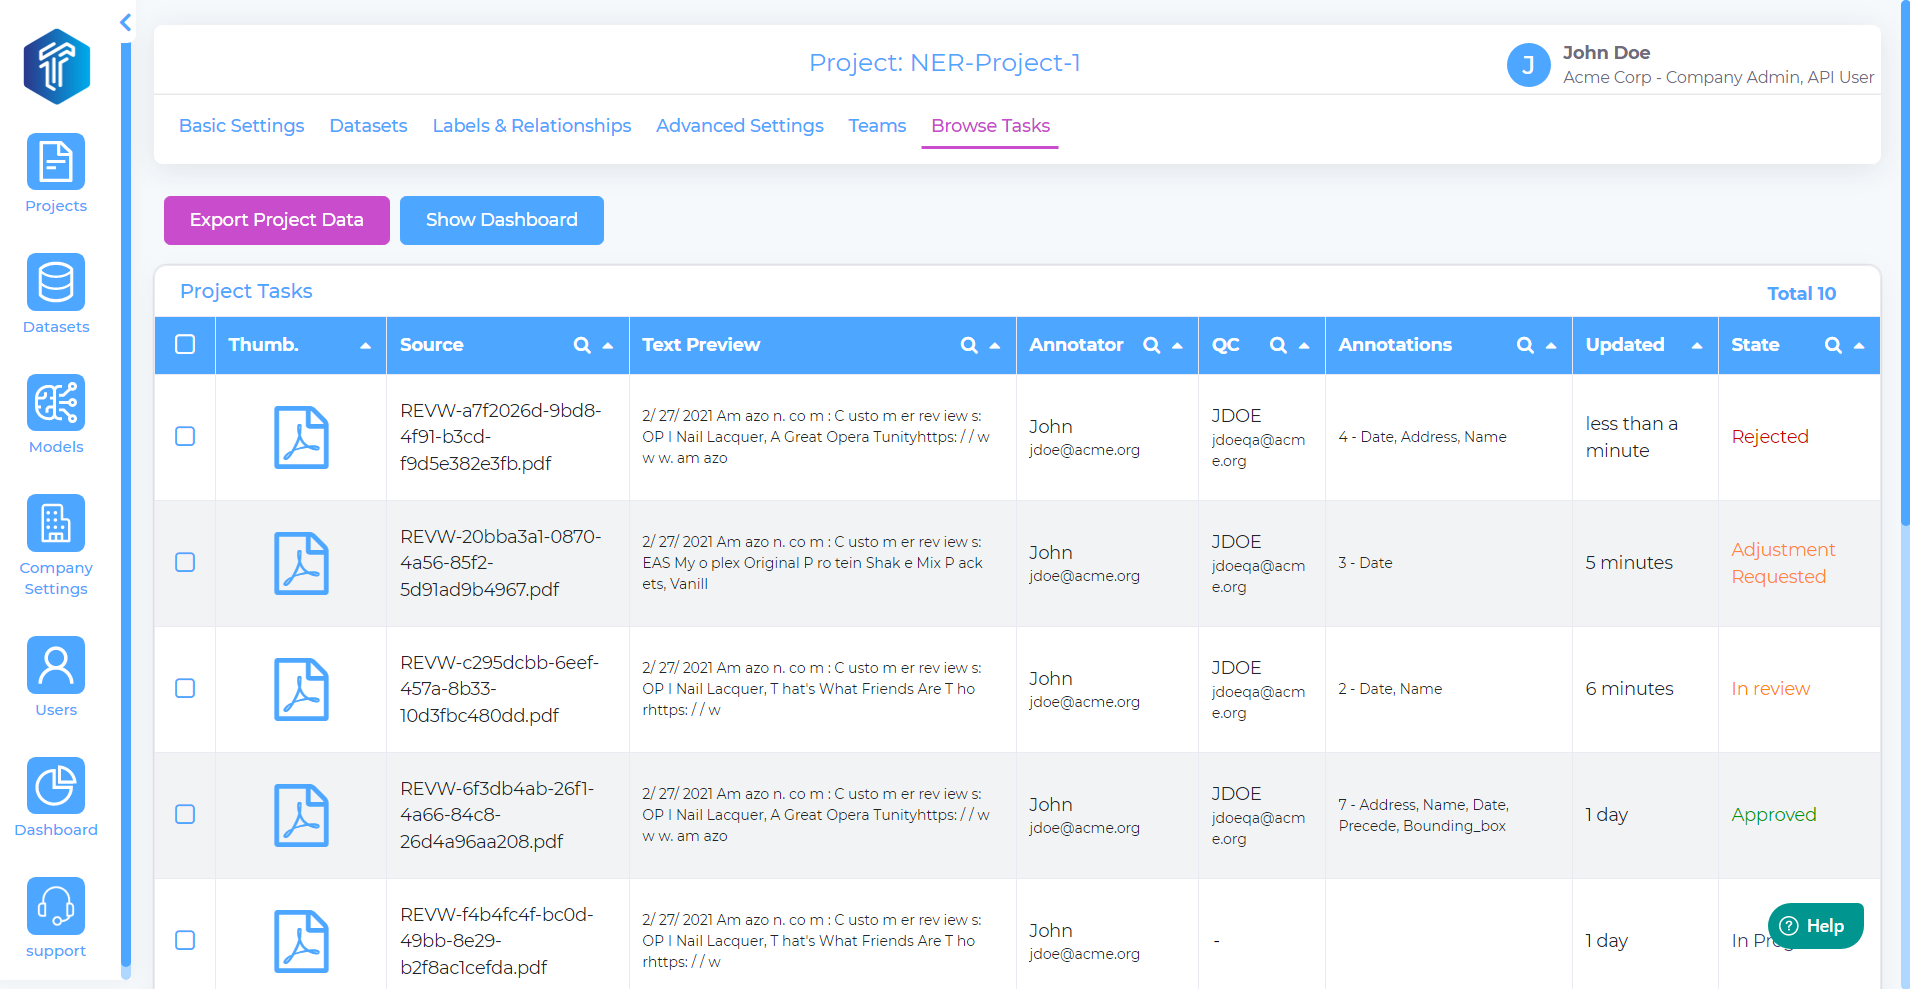
Users can also view tasks that are prelabeled.
Annotator View
When an Annotator logs into to the workbench, the task queue is displayed with a list of tasks that the Annotator can work on.
Watch the below video to a feel of the Annotator view and the options available to the Annotator to accurately and efficiently label the tasks.
If the project has got Pre and Auto-labeling enabled, then the task gets pre labelled by the model and can be adjusted by the Annotator as needed, including requesting Auto labeling on demand.
Reviewer View
The QC or Reviewer role in workbench is assigned to members who have the responsibility to review the work of Annotators and can approve / reject / request adjustments from the annotator on a given task. Below video illustrates the QC/Reviewer view.