Comprehend-NER
Watch below video for a quick glimpse into Comprehend NER project creation. Each step and option is detailed further below on this page.
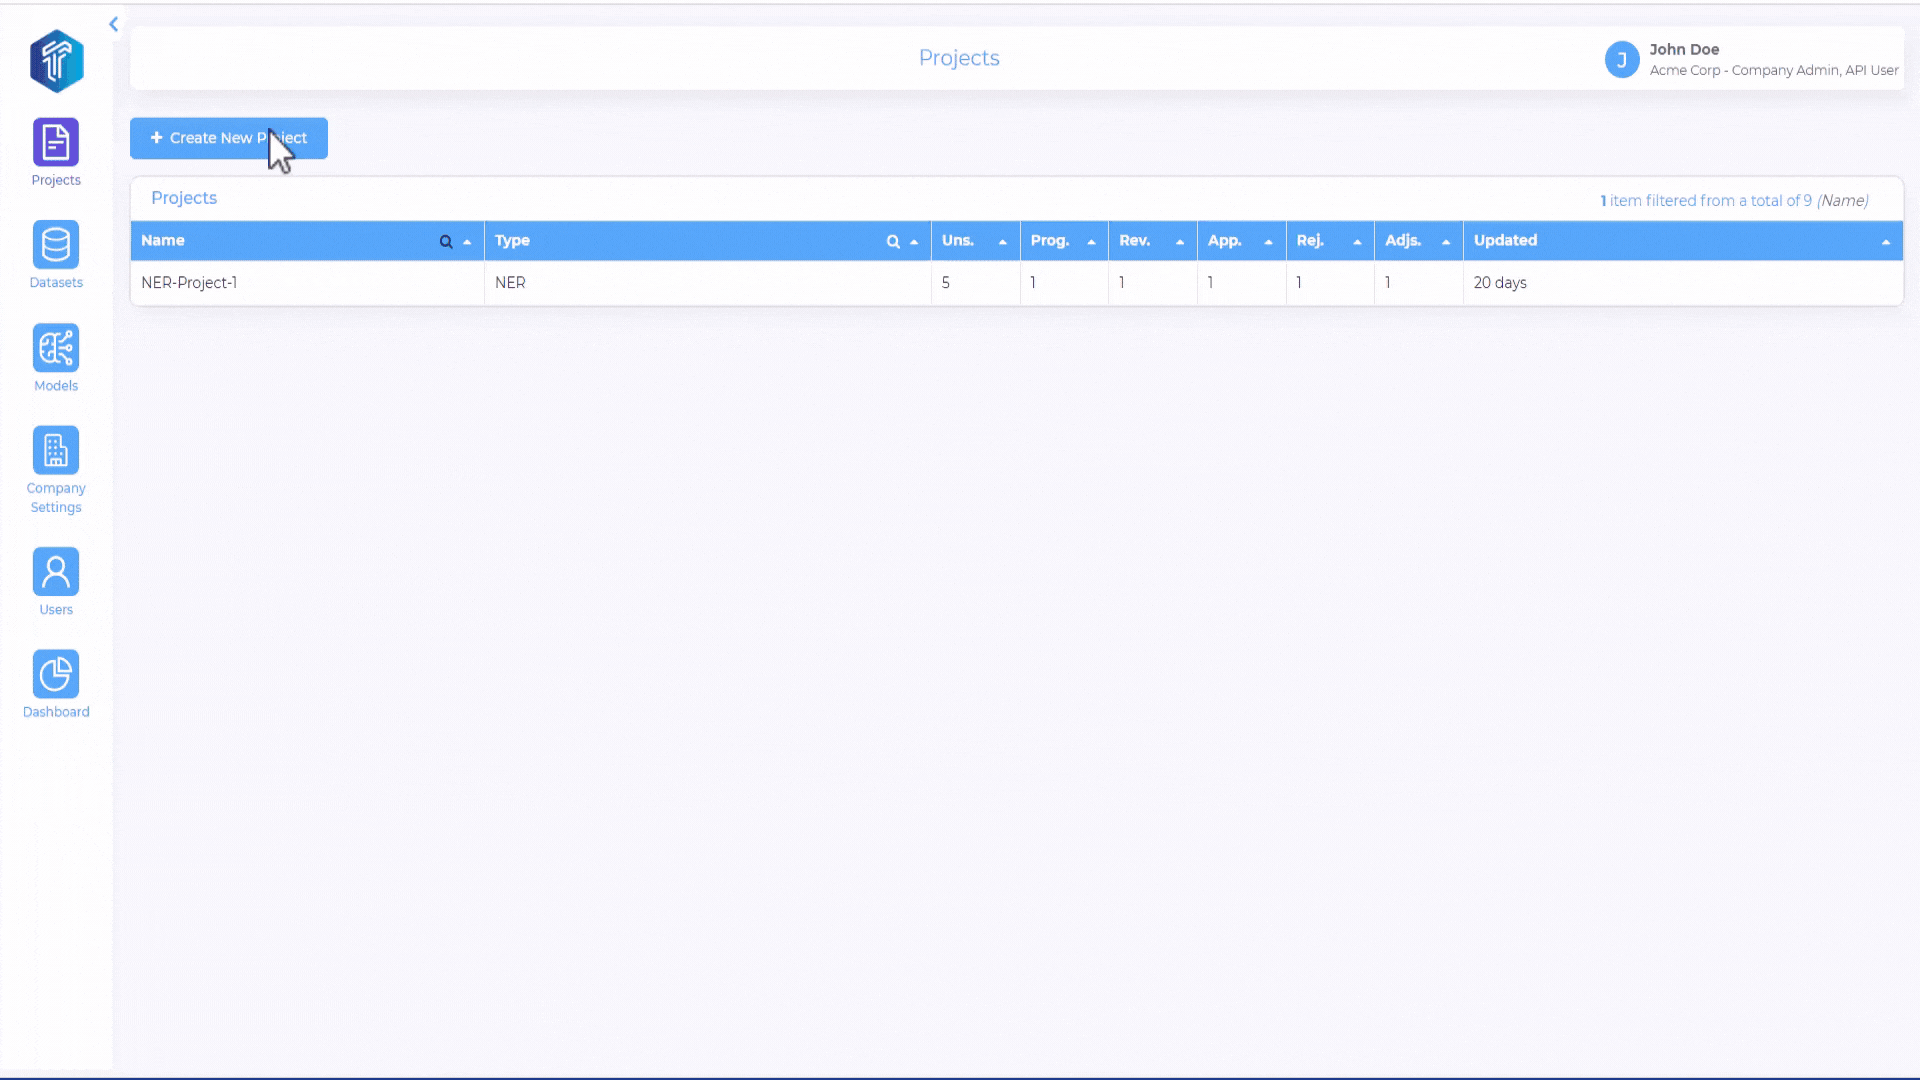
Create Project
On the Projects menu in left-side navigation pane, Click Create New Project
Enter a unique Project Name and a relevant Project Description
On the project type drop-down, select Comprehend-NER and Click Next
File Upload
To add text documents to this project from local workstation, click Drop files here or to click upload and choose file/files to upload. Click Next to proceed.
Files for the project can be referenced from AWS S3 Bucket as source too. Refer to section AWS Security for more information.
Labels
Textract processing
Extract Tables using Amazon Textract - It extracts tables.abels
Labels
Enable Labels
Enter Labels
Click Next
Advanced Settings
The Advanced Settings section has some useful features which would drive the task workflow behaviour. Each setting is explained in detail below.
Note
Configuration in Advanced settings will be applicable to only the selected project.
Following are the options available in the ‘Advanced Settings’ section and each of these are explain in detail below.
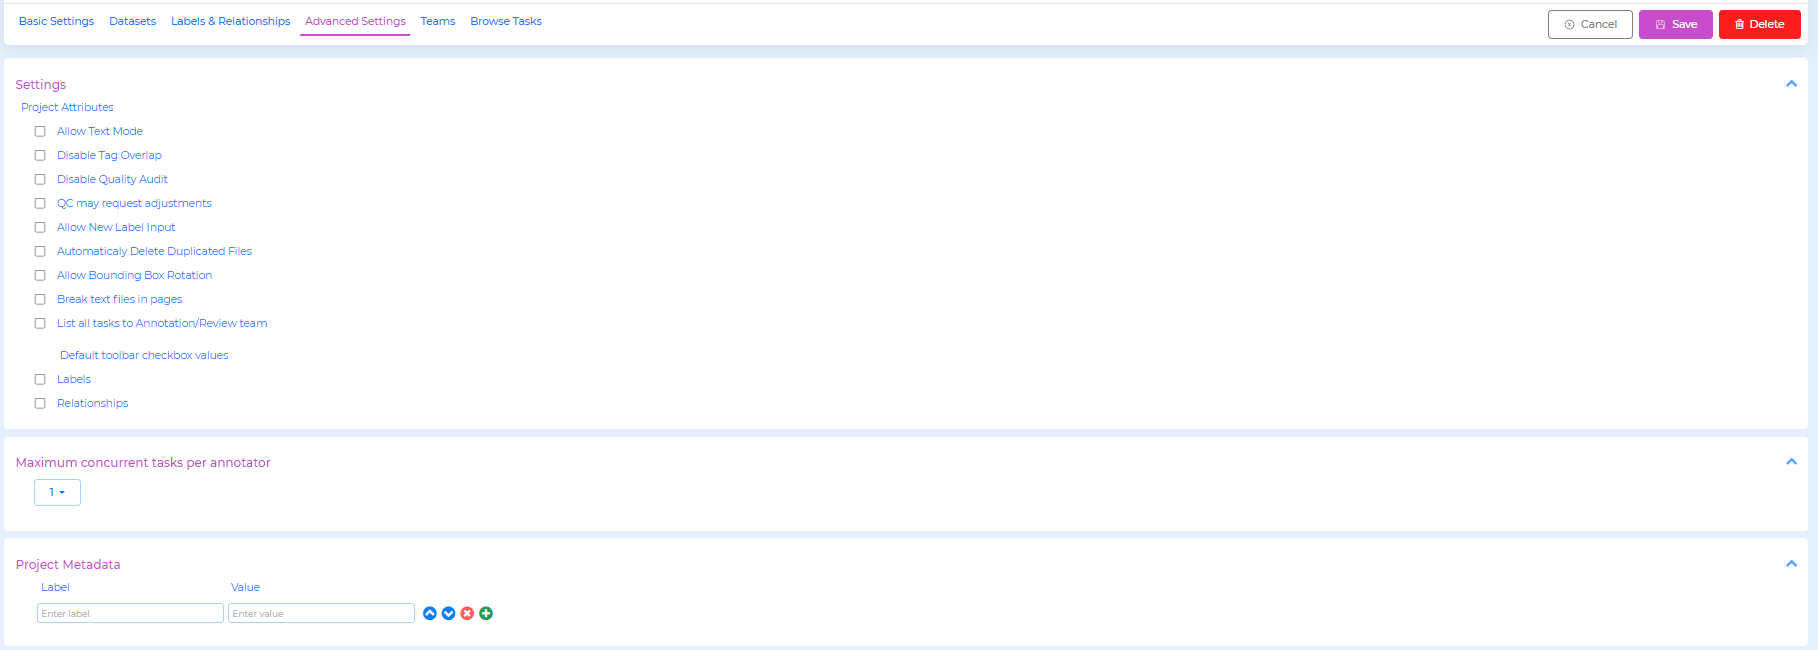
Project Attributes
Each Project Attribute setting is explained below
Allow text mode
This setting enables icons in the task which would show the position of text, labels and relationships in the document, depending on the value selected in the Default toolbar checkbox values section. This setting is related to the Default toolbar checkbox values setting. If Text option is checked, then default text mode is enabled in the task. If Labels and Relationships options are checked, then default labels and relationships are displayed in the task.
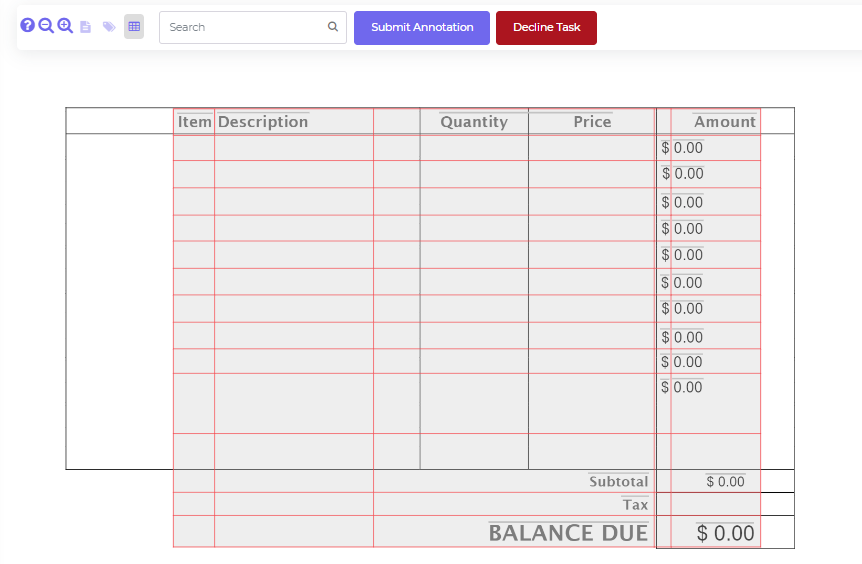
Allow table mode
This setting enables Table icon in the task.
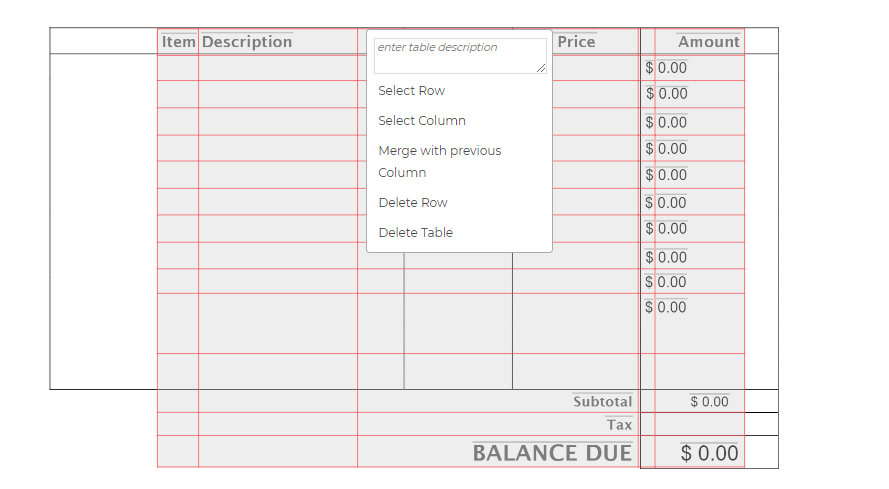
In task,To create a table, click on the table icon on the top.
Then select the area where the table should be created.
User can edit the table by right clicking on cells.
User can also select multiple cells with rightclick.
The context menu will show the options
Disable tag overlap
This setting either allows (when not selected) or disallows (when selected) overlapping annotations in the document.
Disable Quality Audit
If this option is unchecked, then tasks submitted by the annotator will be in Submitted for review state and has to be reviewed by the QC /Reviewer. If this option is checked, then there is no reviewer in the workflow. Upon submission by the annotator, the task will transition directly to Submitted state.
QC may request adjustment
- This option will be visible only if the Disable Quality Audit option is unchecked. When the QC may request adjustment is unchecked, then below two options are available for the reviewer to choose in the task.
Annotations are ok - when reviewer selects this option, the task will transition to Approved state.
Reject annotations - when reviewer selects this option, the task will transition to Rejected state.
When the QC may request adjustment option is checked, then an additional option: Request Adjustment is available for the reviewer, along with the earlier two options Annotations are ok and Reject annotations. If the reviewer opts for Request Adjustment, then task will be returned to the Annotator with Adjustment Requested status
Allow new label input
When this option is selected, then Add label option is available for users in the task lable list. Through this feature, the user has the ability to add a new label in the task.
Use Amazon Textract for OCR
Amazon Textract is a service that automatically extracts text, handwriting, and data from scanned documents.
It goes beyond simple optical character recognition (OCR) to identify, understand, and extract data from forms and tables.
List all tasks to Annotator/Review Team
If Full view is set, all tasks from the project will feature in the annotators jobs page as below. The user might view all tasks but some may be locked depending on ownership and task state.
Maximum concurrent tasks per annotator
This setting controls the maximum number of concurrent tasks that will be allotted per annotator.
Note
When List all tasks to Annotator/Review Team setting is enabled, then Maximum concurrent tasks per annotator option will not be available.
Project Metadata
Under Project Metadata, Labels and Values can be set and these metadata values will be preserved in the task, export mainifest file and project descriptor json file. This can be leveraged to track and filter useful metadata related to the project.
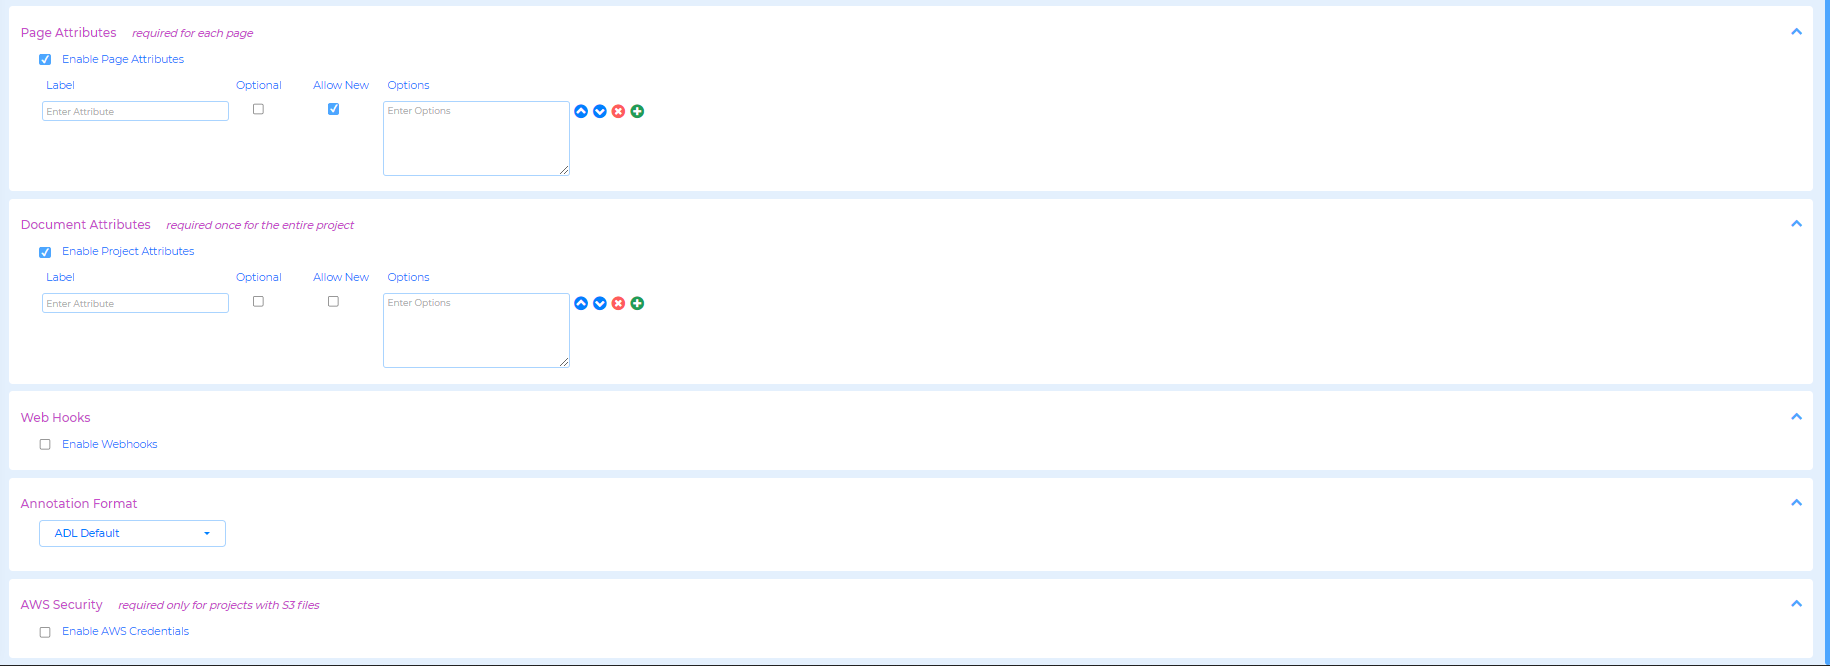
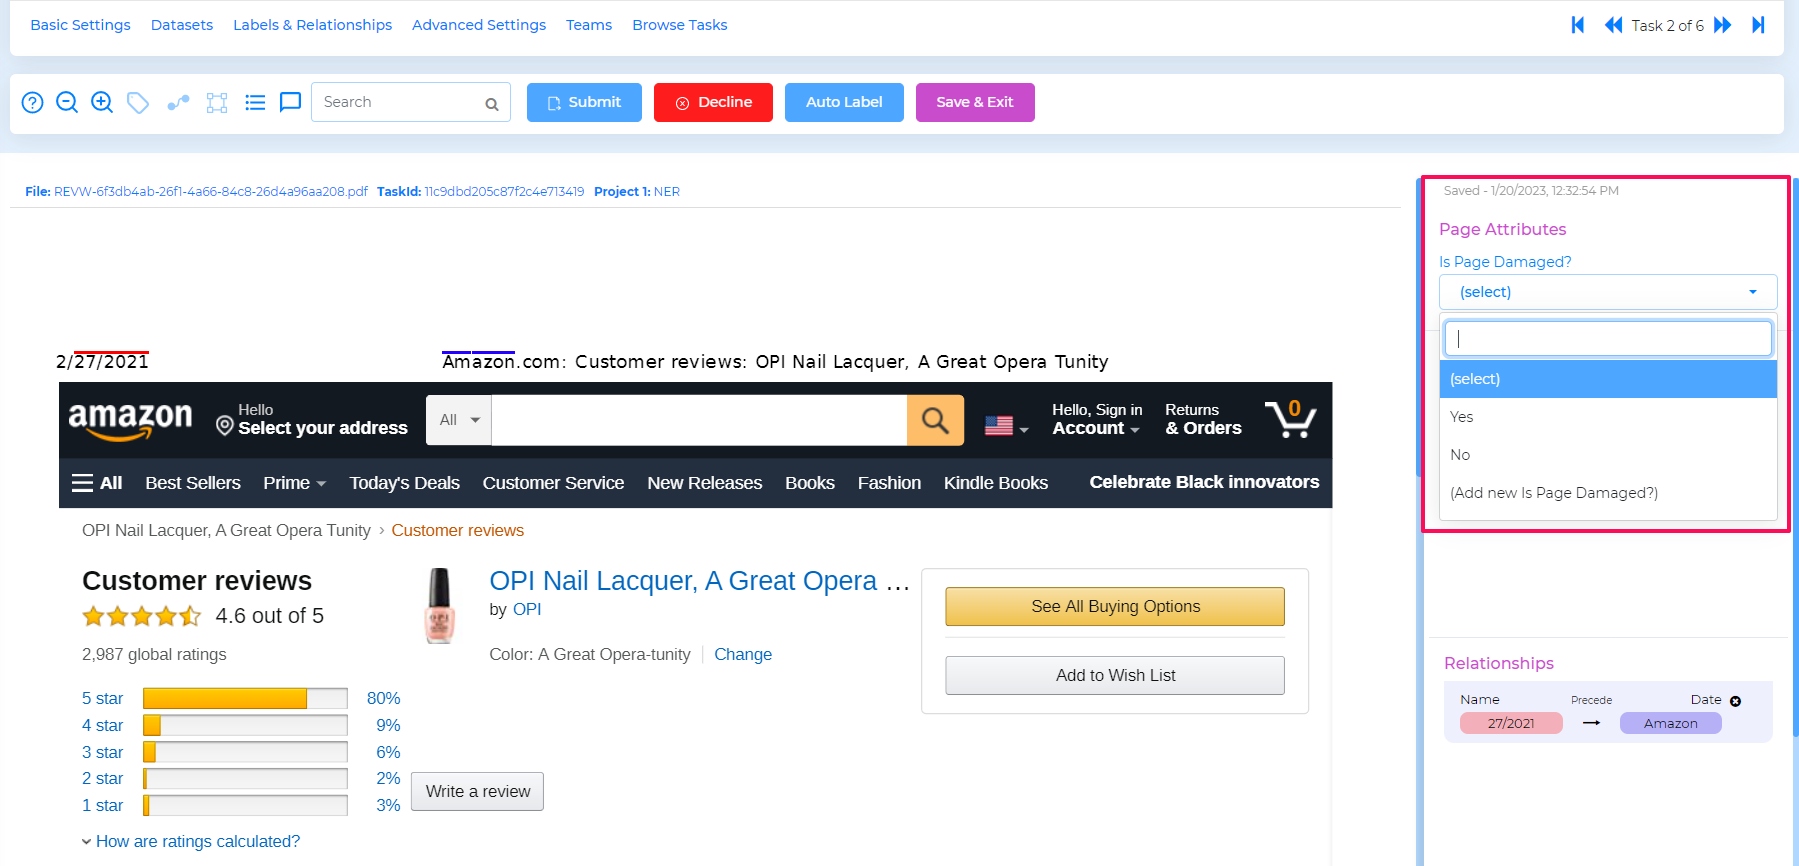
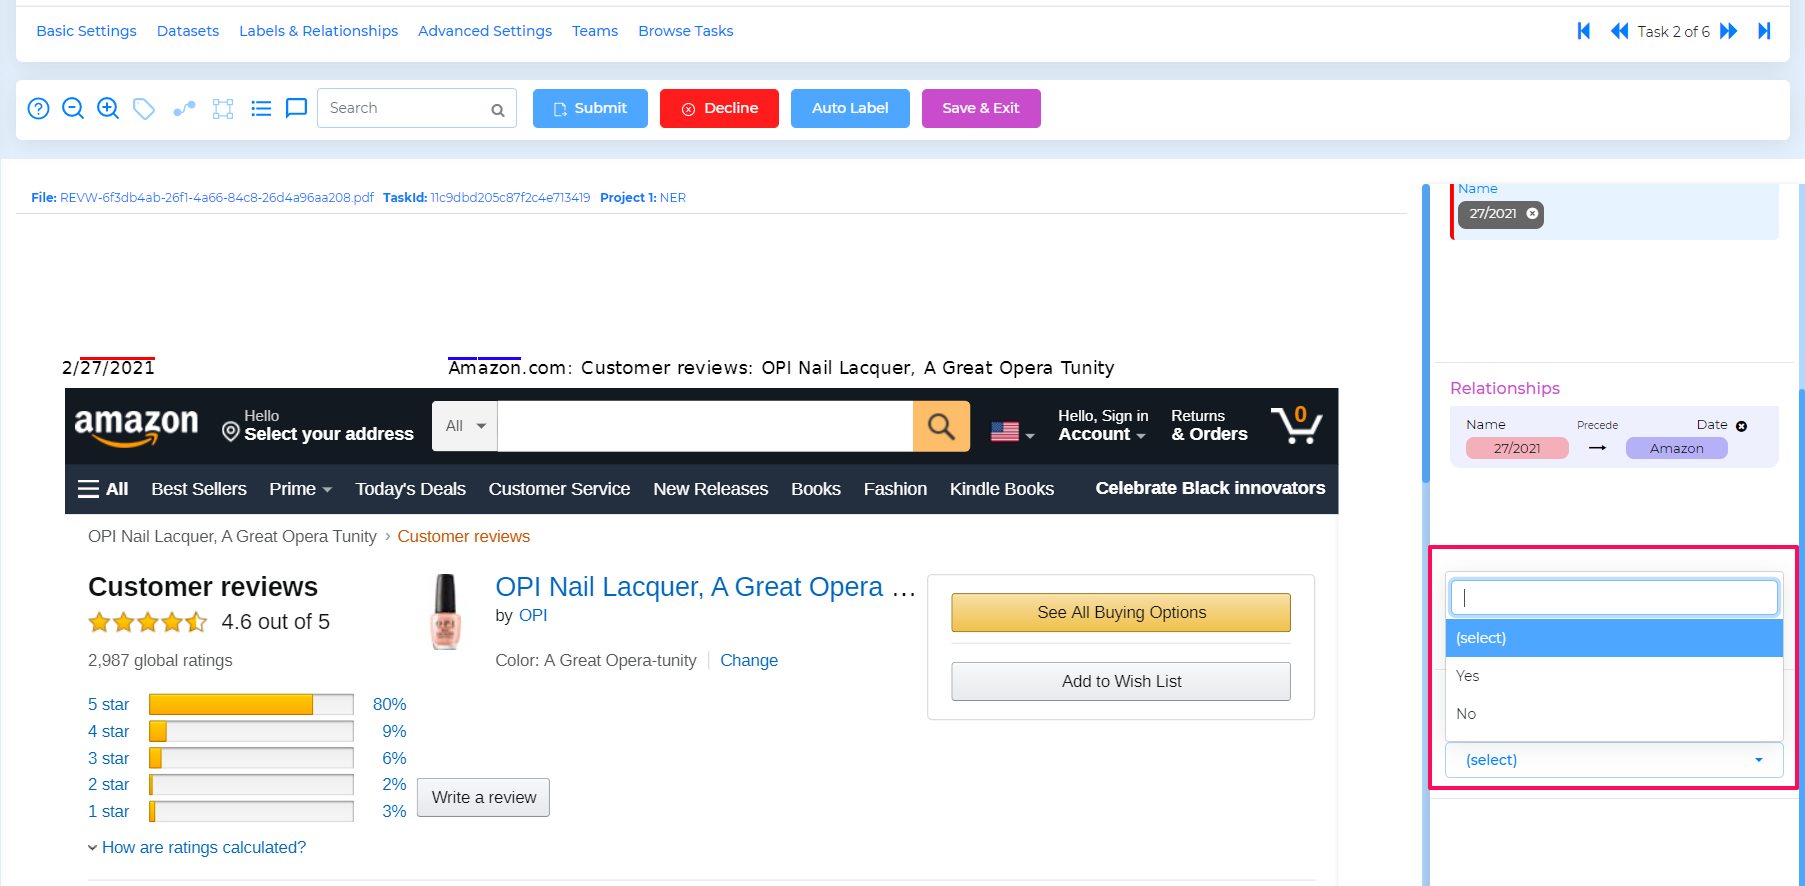
Page and Document Attribute
Through this setting, a user can provide a customized status of a page in the document or the entire document itself.
Page attribute appears as below in the task.
Document attribute appears as below in the task.
Webhook
Webhooks are automated messages that can be sent to a configured server URI in response to a specific event. Currently, webhooks are supported for Task update and Project update.
Annotation Format
There are two annotation formats available for the NER project.
Comprehend Format Full
Comprehend Format with linked Blocks
ADL Bounding Box Format
AWS Security
This section defines how the workbench would authenticate with AWS account, where the project is configured to reference data from a source S3 bucket. Three authentication methods are available as listed below.
Use Global IAM Credentials In this option, the workbench leverages the global IAM credentials to authenticate to the S3 bucket.
AWS Credentials In this option, the user can configure AWS Access key, Secret key and Region to enable Newton workbench to authenticate with AWS.
ARN Role In this option, the user can specify AWS Role ARN and External Id for the workbench to authenticate with AWS. This is the most secure and preferred method.
In all the above options, also specify the Intermediate S3 Path which will be utilized by the workbench for task processing.
Note
The user is required click :Save for any changes in Advanced Settings to take effect.
Teams
In this section, it is required to specify the users who are going to collaborate and work on the project tasks.
Add Team member
Enter the user-name or email-id to filter in the text box. Select the desired user.
Choose the role as Annotator, Reviewer or Supervisor
Click :Add Collaborator
Delete Team member
Click x symbol against the user you wish to remove from this project.
Click Yes to confirm and the user will get removed from the project.
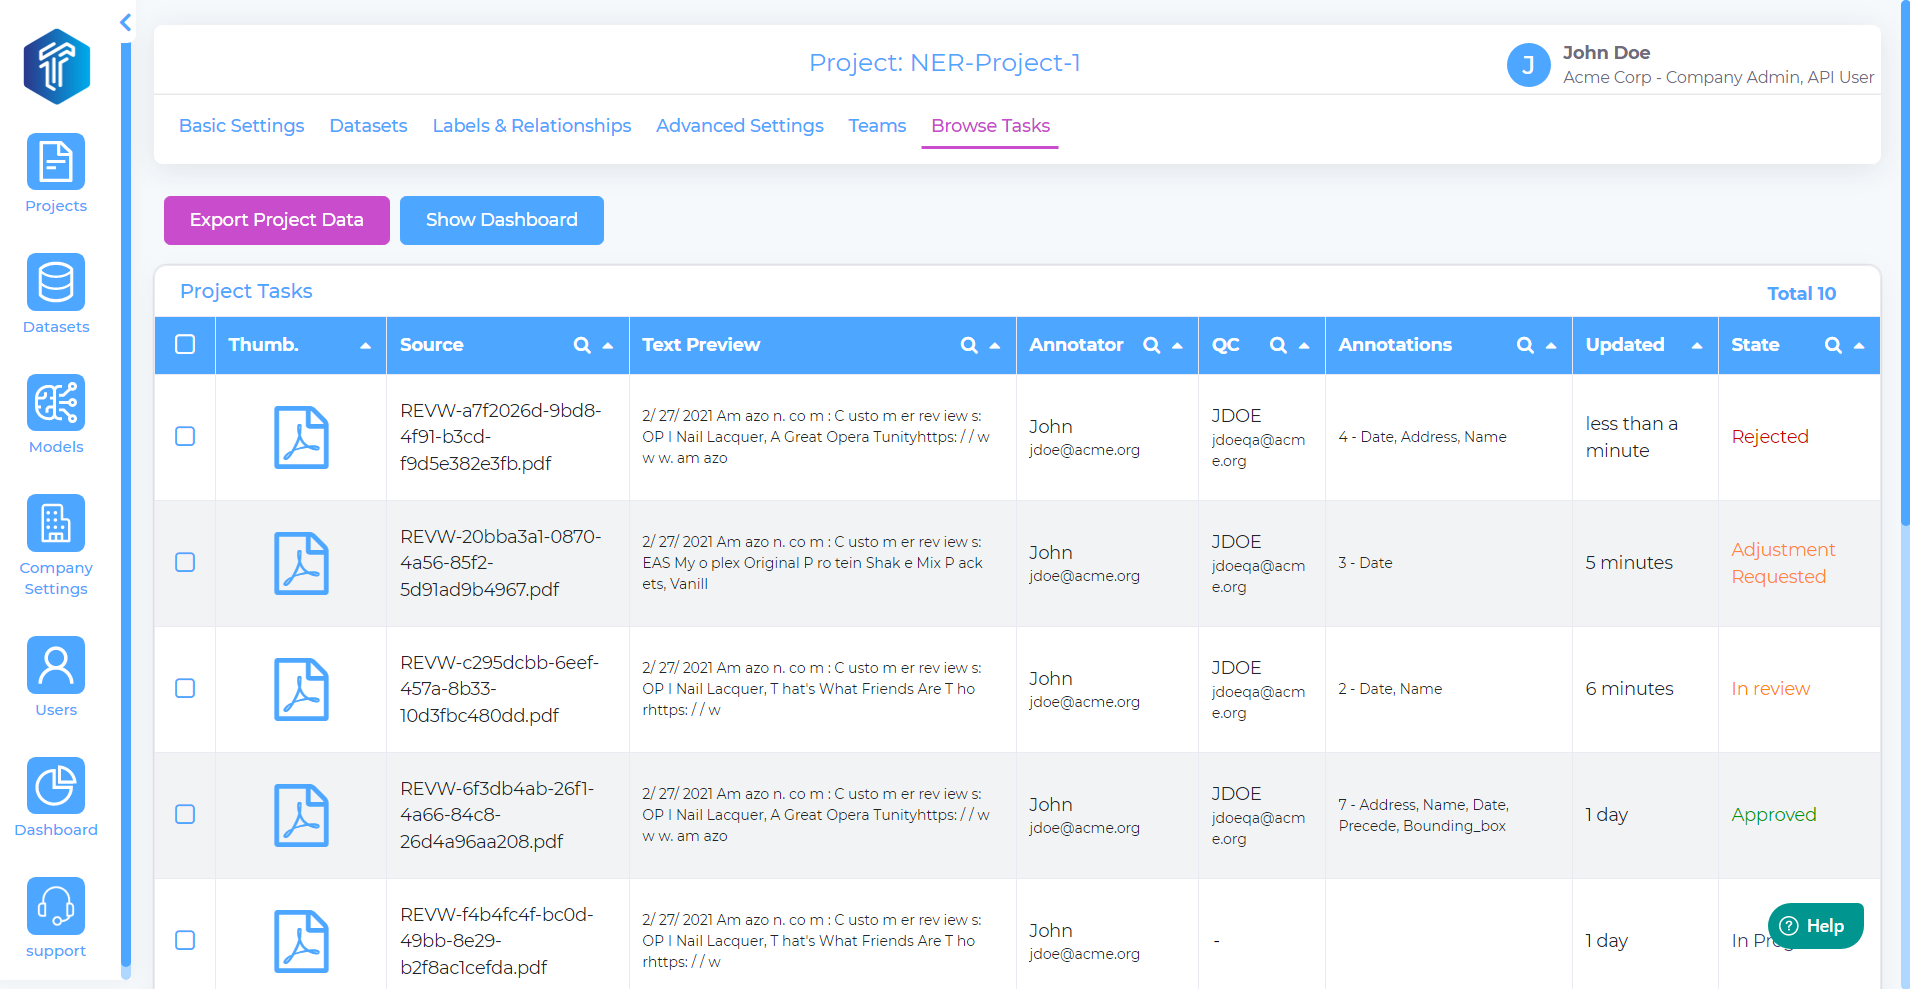
Browse tasks
This section will display a summary of tasks in the selected project.